


Photo by Christopher Gower on Unsplash
Publish an Android Library to Azure Artifacts Using Mavin Publish Gradle Plugin
In this article we are going to configure an android library with Mavin Publish Plugin and publish it to Azure Artifacts then use it in an android app


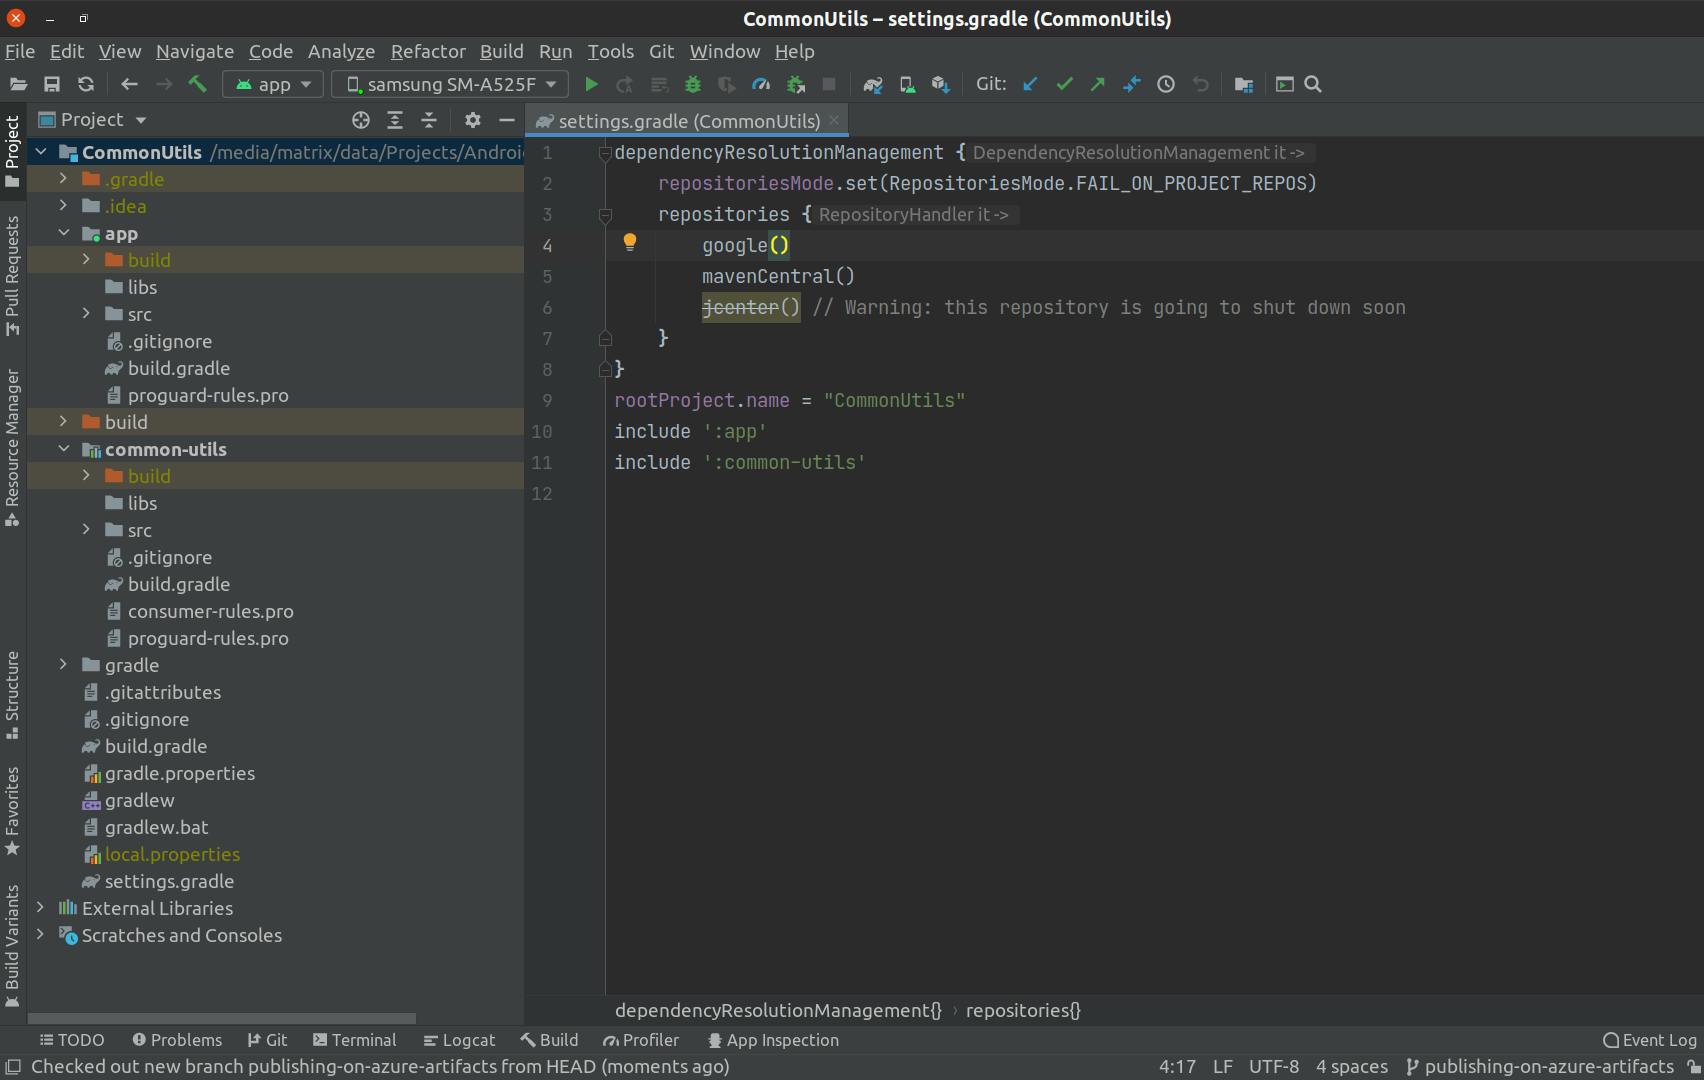
First let's assume that you already created and have an existing android library configured with gradle (if you didn't create the android library check the first article in this series that explains and demonstrate how to do that) and let's assume that the library module you created is called "common-utils" as in our previous article in the series. Your project structure should be similar to the following structure:
Basic Concepts and Terminologies
To be able to publish the library to a maven repository we need to configure the the library with the Mavin Publish Gradle Plugin but first we need to explain a few concepts and definitions and that's what we are going to do (all the following definitions taken as is from the docs and in other times I edited the definition to be easier to understand).
Artifact: A file or directory produced by a build, such as a JAR, a ZIP distribution, or a native executable.
Module: A piece of software that evolves over time e.g. Google Guava. Every module has a name. Each release of a module is optimally represented by a module version.
Module metadata: Releases of a module provide metadata. Metadata is the data that describes the module in more detail e.g. information about the location of artifacts or required transitive dependencies. Gradle offers its own metadata format called Gradle Module Metadata (.module file) but also supports Maven Metadata (.pom).
Module version: represents a distinct set of changes of a released module. For example 18.0 represents the version of the module with the coordinates com.google:guava:18.0.
Repository: A repository hosts a set of modules, each of which may provide one or many releases (components) indicated by a module version.
Maven Repository: A directory of packaged JAR files with extra meta-data (The meta-data is represented by POM files) and contains all the project jars, library jar, plugins and any other project specific artifacts. These packaged JAR files can be consumed by Maven, Gradle and other tools that understand the Maven repository format and used in other project after adding them as dependencies.
Gradle Plugins: They add new tasks (e.g. JavaCompile), domain objects (e.g. SourceSet), conventions (e.g. Java source is located at src/main/java) as well as extending core objects and objects from other plugins. Gradle at its core intentionally provides very little for real world automation and all of the useful features, like the ability to compile Java code, are added by plugins.
Publishing: Is the process by which the thing being built is made available to consumers. It could be a library that other software projects use or it could be an application for end users. In Gradle, that process looks like this:
- Define what to publish
- Define where to publish it to
- Do the publishing
Each of the these steps is dependent on the type of repository to which you want to publish artifacts.
Maven Publish Plugin: Is a gradle plugin that provides the ability to publish build artifacts to an Apache Maven repository and allow you to configure what to publish and perform the publishing with a minimum of effort. A module published to a Maven repository can be consumed by Maven, Gradle and other tools that understand the Maven repository format.
Gradle Maven Publication: a publication destined for a Maven repository that includes:
- One or more artifacts — typically built by the project.
- The Gradle Module Metadata file which will describe the variants of the published component.
- The Maven POM file will identify the primary artifact and its dependencies. The primary artifact is typically the project’s production JAR and secondary artifacts might consist of "-sources" and "-javadoc" JARs.
Now that we went through some terminologies and definitions let's proceed with how to configure the android library with the Mavin Publish Gradle Plugin.
Configuring the Android Library with Maven Publish Plugin
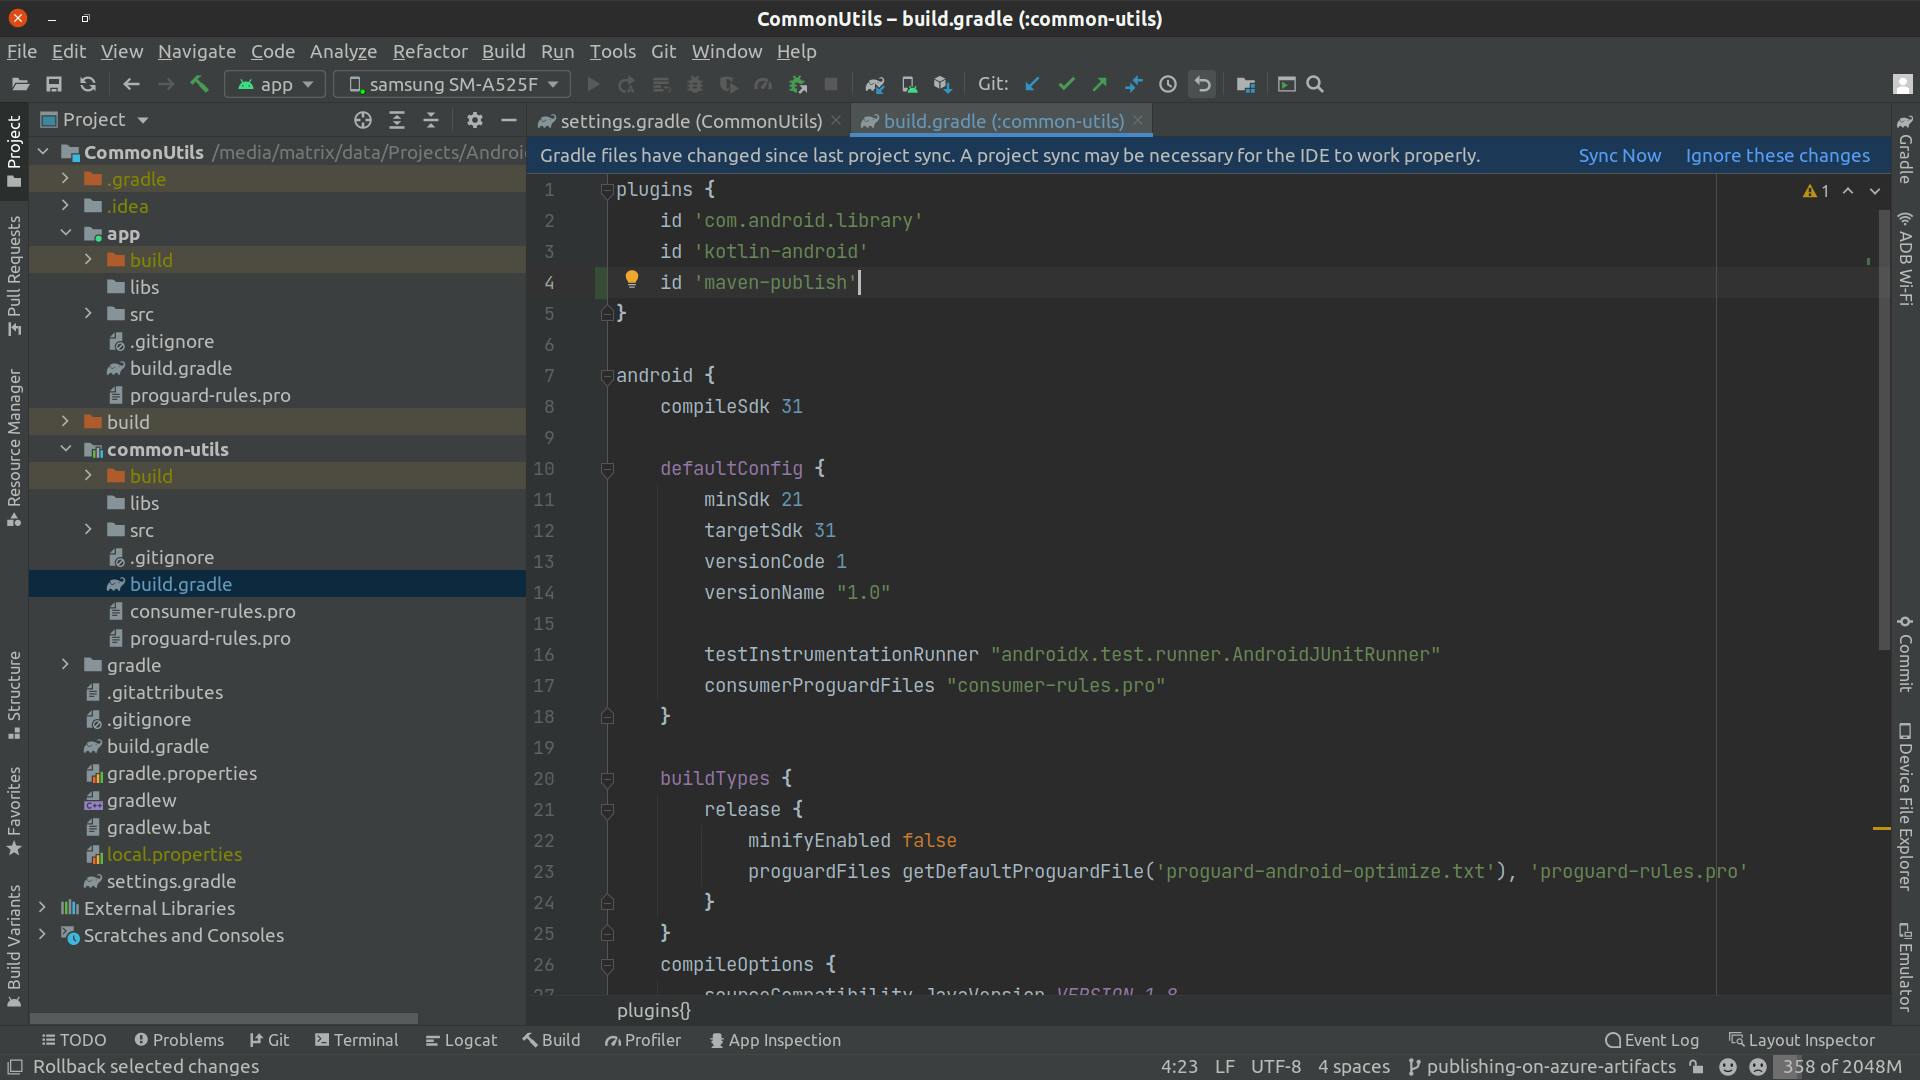
Let's start by adding the Maven Publish Plugin to the android library by adding this plugin to the plugins section in build.gradle file in the 'common-utils' module (which is the gradle module for our existing library):
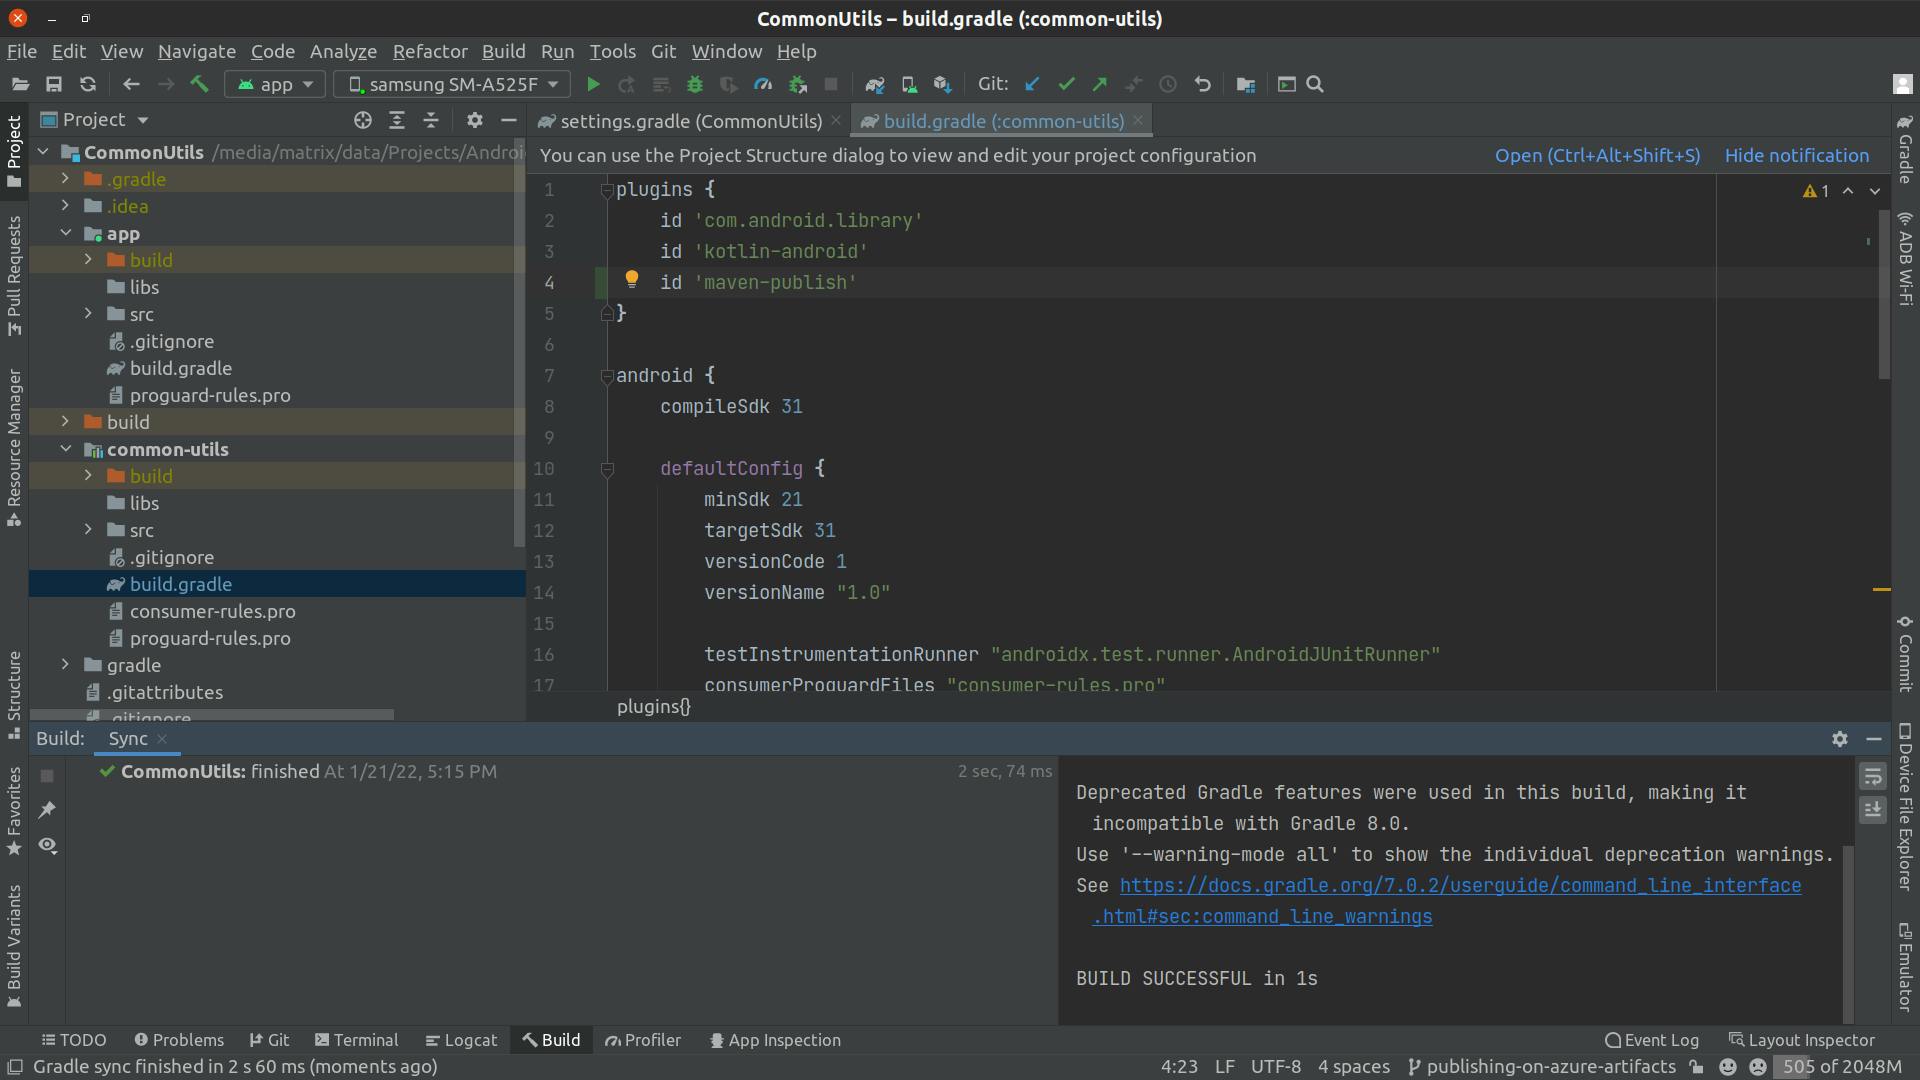
 plugins {
     id 'com.android.library'
     id 'kotlin-android'
     id 'maven-publish'
 }
After adding the plugin to the plugin section you will be shown an option that the gradle files have changed with a suggestion to sync the gradle files. Click on 'Sync Now' and wait for the gradle sync to finish.
We need to define two things: publications (what to publish) and repositories (where to publish it). The Maven Gradle Plugin provide the ability to do that by defining the publishing through adding the following publishing block (which is backed by PublishingExtension) in build.gradle file in the 'common-utils' module after the dependencies block.
 publishing {

 }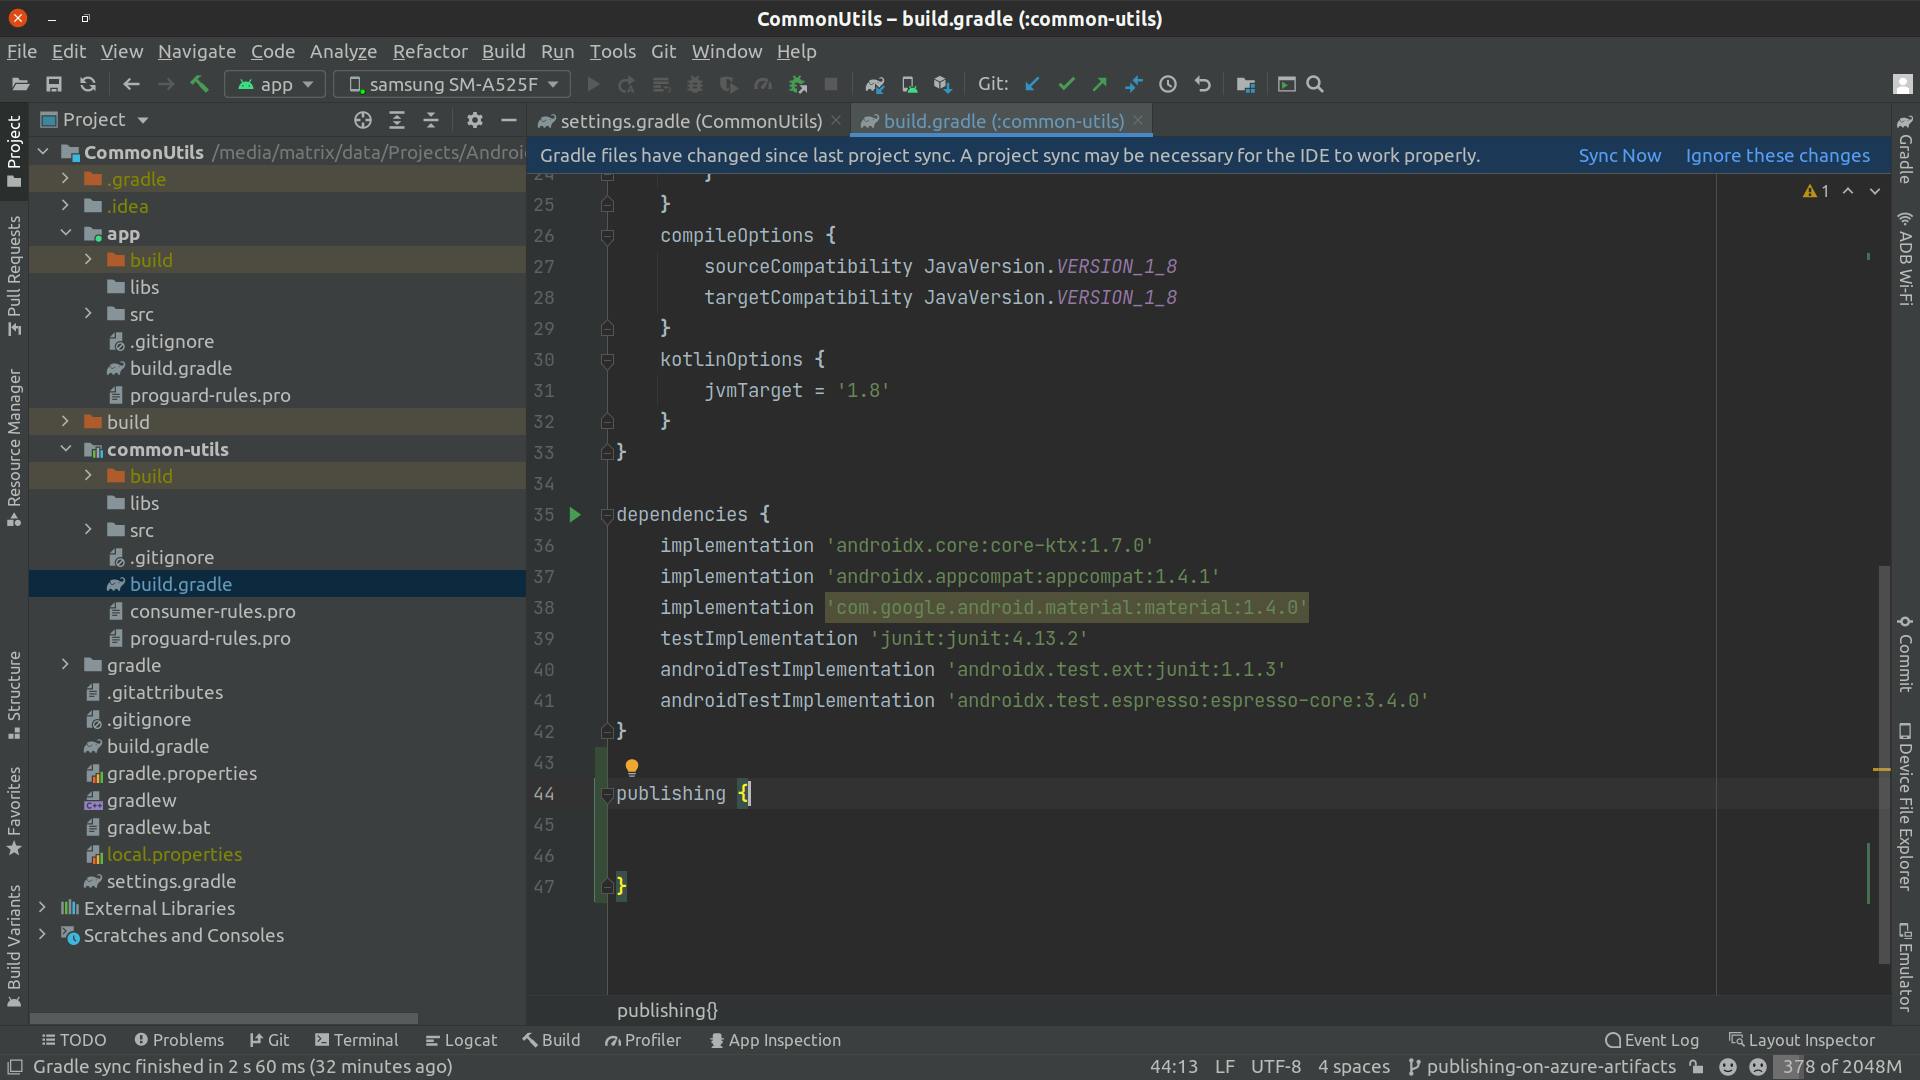
We need to define the publications block and define a maven publication block (which we will explain in details). To do that inside the publishing block add the following block of code.
 publishing {
     publications {
         release(MavenPublication) {
             from components.release

             groupId 'com.example'//<GROUP_ID>
             artifactId 'commonutils-release'//<ARTIFACT_ID>
             version '0.1.0'// Your package version
         }
     }
 }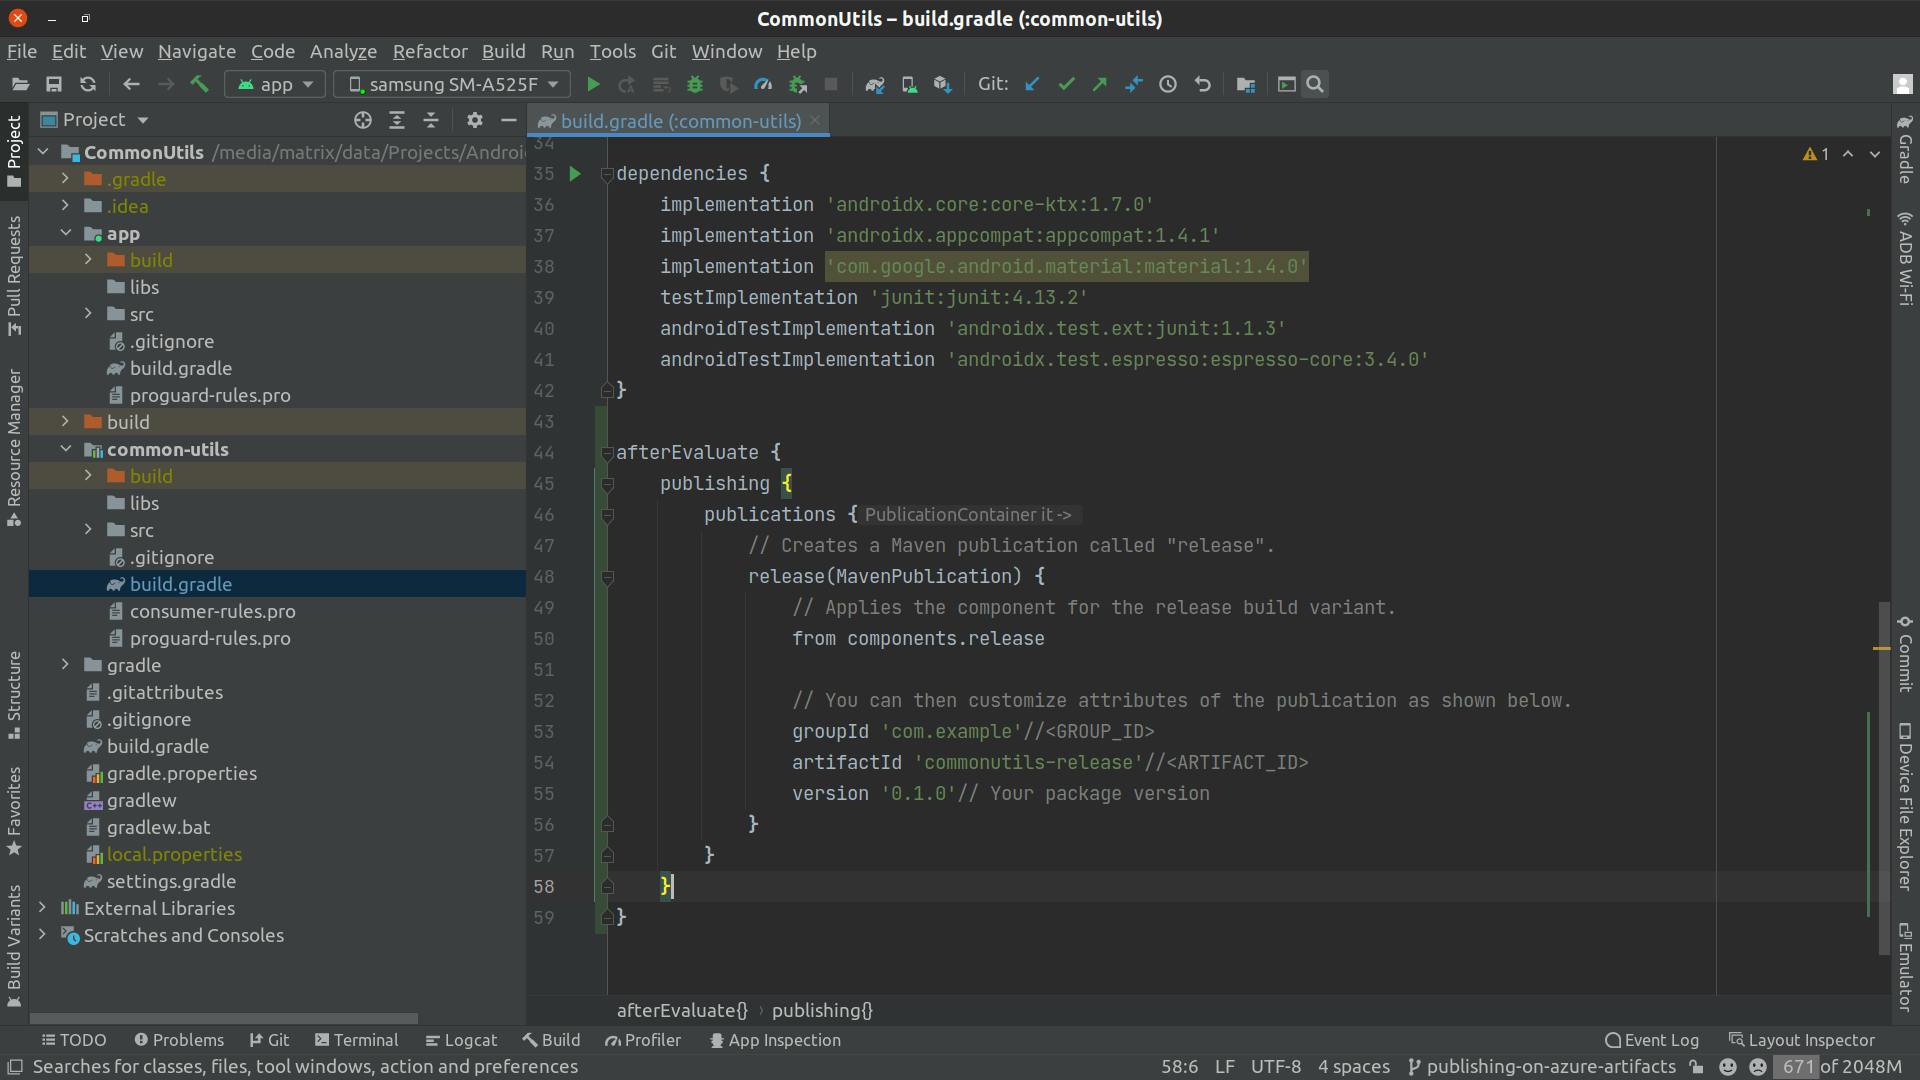
Let's explain the block of code we added in more details and what each line means:
release(MavenPublication) { }: Creates a Maven publication block called "release" that can be published to a Maven repository which indicated by the type between braces.from components.release: Indicate that This publication consists of just the release AAR artifact and its metadata by applying the release component of the project to build the release build variant(which will be used in generated tasks by gradle).groupId 'com.example': defines the group id of the package for this publication (which will be used when the library is consumed in other projects).artifactId 'commonutils-release': defines the artifact id of the package for this publication (which will be used when the library is consumed in other projects).version '0.1.0': defines the version of the package for this publication (which will be used when the library is consumed in other projects).Note: Maven restricts groupId and artifactId to a limited character set ([A-Za-z0-9_\-.]+) and Gradle enforces this restriction. For version (as well as the artifact extension and classifier properties), Gradle will handle any valid Unicode character.The only Unicode values that are explicitly prohibited are \, / and any ISO control character. Supplied values are validated early in publication.
We need to define the repositories block which are the repositories that gradle can publish artifacts to them. To do that inside the publishing block add the following block of code.
 repositories {
         maven {
             name = 'azure'
             url 'https://pkgs.dev.azure.com/'
             credentials {
                 username "user name"
                 password "password"
             }
         }
 }
Let's explain the block of code we added in more details and what each line means:
maven {}: indicate the type of the repository and in this case it's a maven repository.name = 'azure': determine the name of the maven repository (which will be used in generated tasks by gradle).url 'https://pkgs.dev.azure.com/': determine the url location of the maven repository that we are going to publish to it.credentials {},username "user name"andpassword "password": configure any authentication details that are required to connect to the repository url defined previously (will be discussed in details later).Notes:
Gradle needs to interact with the repository, which is why you must provide the type of the repository, its location and the authentication details that are required to connect to the repository.
You can define multiple repositories as long as they have unique names within the repositories block in the build script. You may also declare one (and only one) repository without a name. That repository will take on an implicit name of "Maven".
If we try to click on 'Sync Now' (that appeared after build.gradle file has changed), we will get an error
A problem occurred evaluating project ':common-utils'. > Could not get unknown property 'release' for SoftwareComponentInternal set of type org.gradle.api.internal.component.DefaultSoftwareComponentContainer..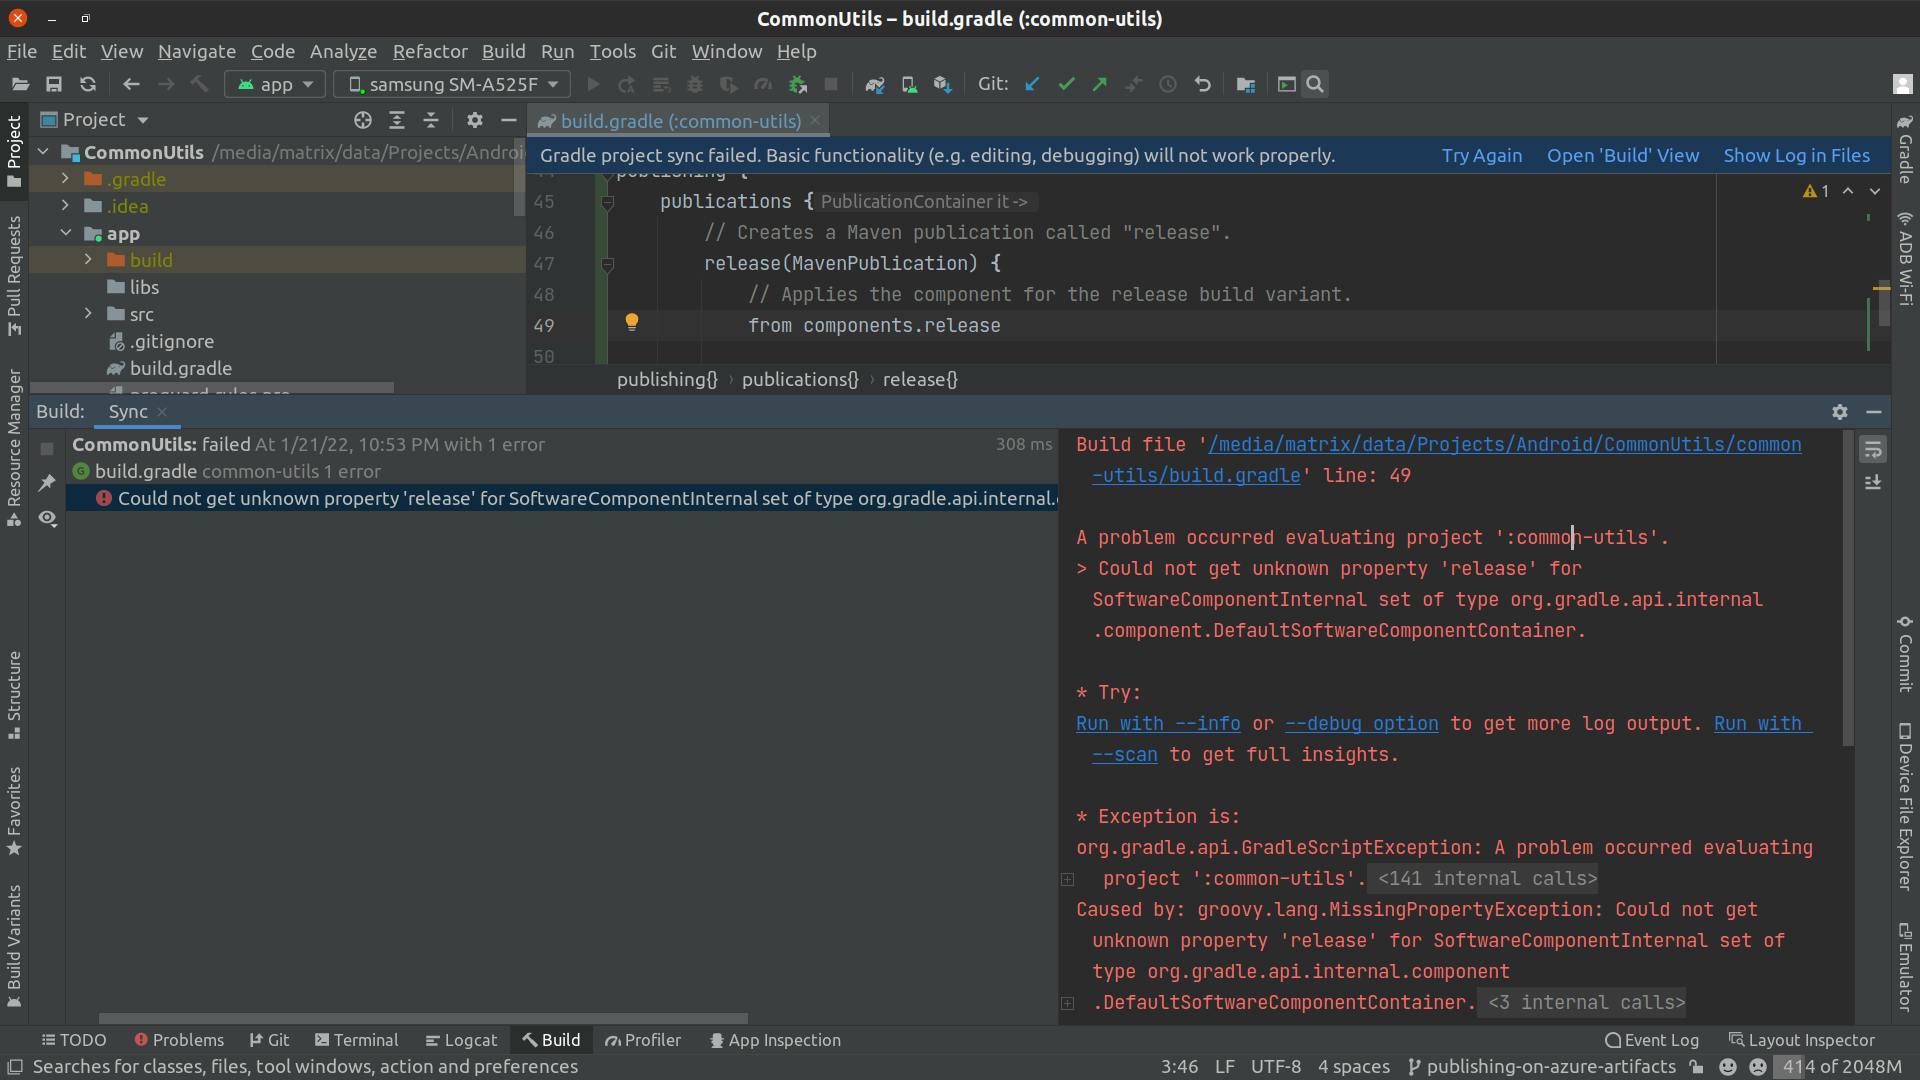 This happened due to some changes and a deprecation in the gradle which is the
 Removal of deferred configuration behaviorwhich the gradle official docs explains as the following:Prior to Gradle 5.0, the publishing {} block was (by default) implicitly treated as if all the logic inside it was executed after the project is evaluated. This behavior caused quite a bit of confusion and was deprecated in Gradle 4.8, because it was the only block that behaved that way. You may have some logic inside your publishing block or in a plugin that is depending on the deferred configuration behavior, this kind of logic must now be wrapped in an afterEvaluate {} block.
Which means, in other words, that
the components are created only during the afterEvaluate phase and you must configure your publications using the afterEvaluate() lifecycle method(for more details check the official docs about project lifecycle). So we need to wrap the publishing block (with publications block and repositories block inside of it) in the afterEvaluate {} block as shown in the following code:afterEvaluate { publishing { publications { release(MavenPublication) { from components.release // You can then customize attributes of the publication as shown below. groupId 'com.example'//<GROUP_ID> artifactId 'commonutils-release'//<ARTIFACT_ID> version '0.1.0'// Your package version } } repositories { maven { name = 'azure' url 'https://pkgs.dev.azure.com/' credentials { username "user name" password "password" } } } } }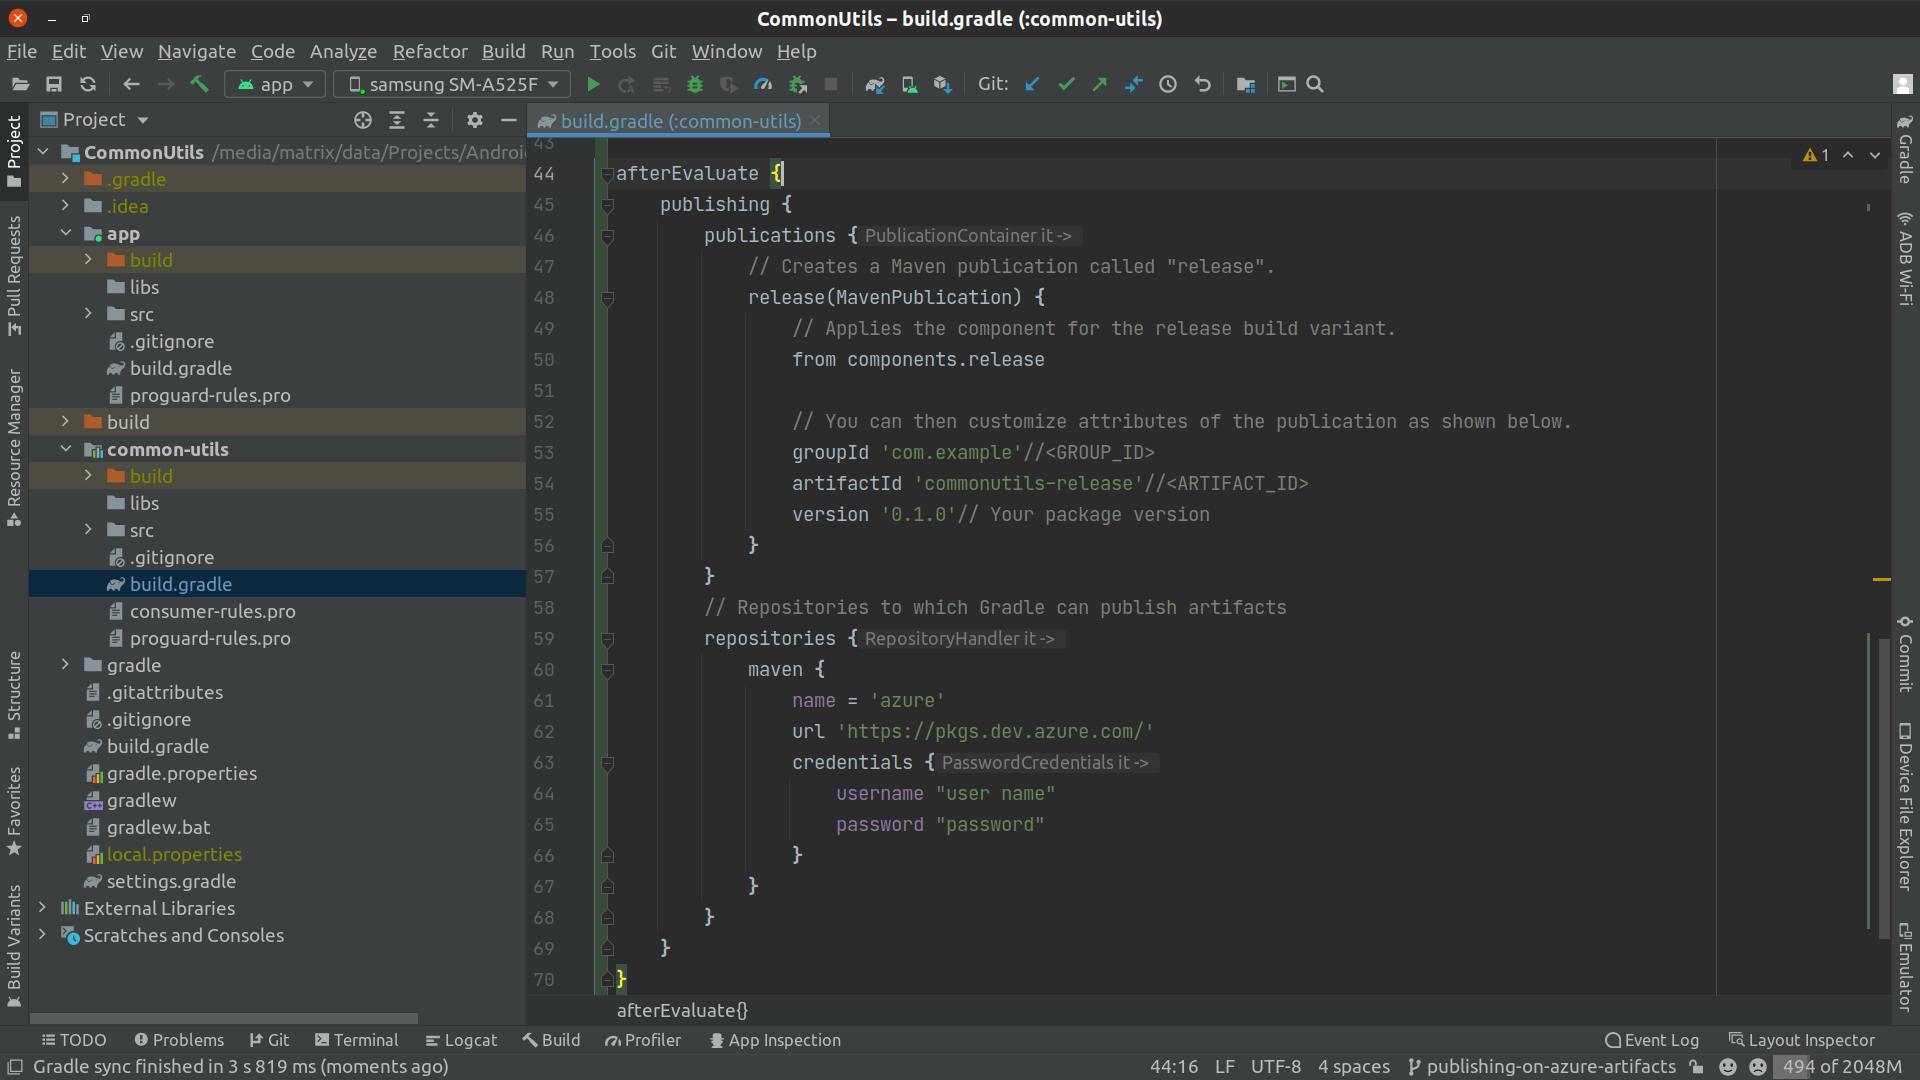
And don't forget to click on "Sync Now" when prompted by android studio!
Congrats!, You finally finished configuring the maven publish plugin in the existing android library. Next we are going to dive into how to configure and prepare Azure to host a maven repository using the Azure Artifacts.
Configure and Prepare Azure Artifact to Host a Maven Repository
The Azure Artifacts is a service in Azure DevOps which as defined by the official docs:
Azure Artifacts enables developers to share and consume packages from different feeds and public registries. Packages can be shared within the same team, the same organization, and even publicly. Azure Artifacts supports multiple package types such as NuGet, npm, Python, Maven, and Universal Packages.
We are interested in the Maven support because it's the type of the repository that we can publish our existing maven android library to and to do that we need to configure the Azure DevOps by following the next steps:
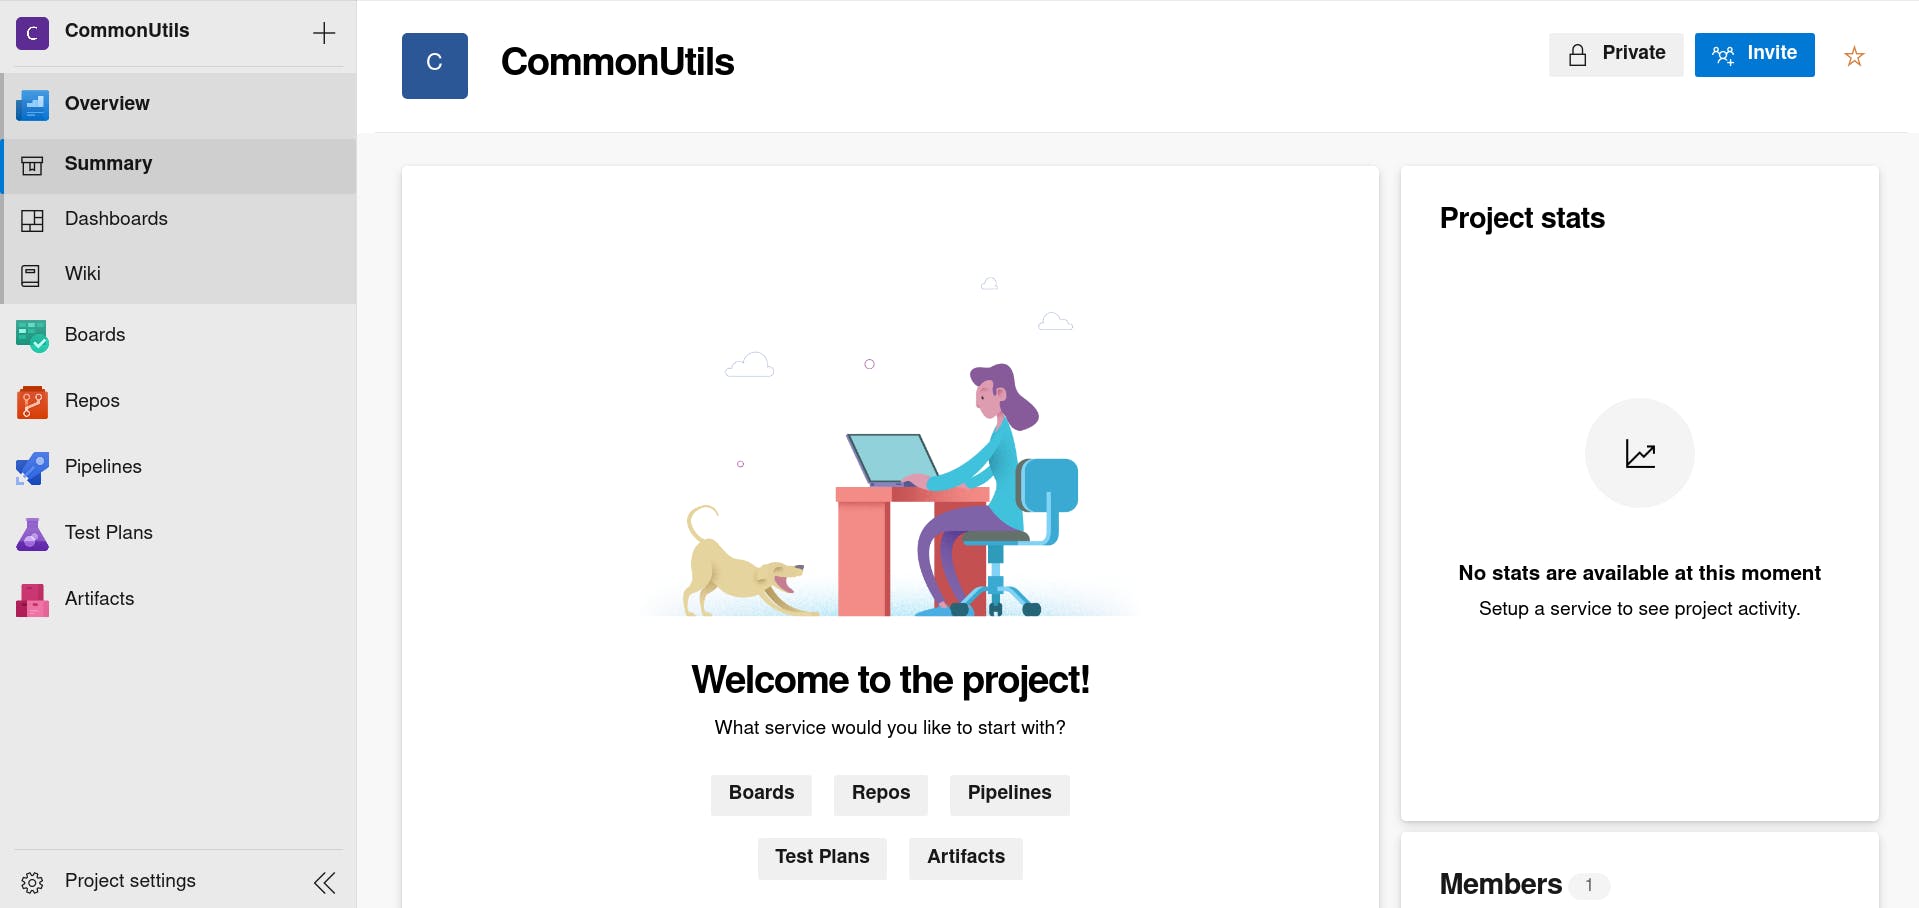
You need to create an azure project on Azure DevOps called "CommonUtils" (which is the name of our library that we are going to publish). If you don't know how to create a project on Azure DevOps refer to this guide and follow the steps mentioned for doing that. After following the steps to create a new project you should see the following when you select the created project.
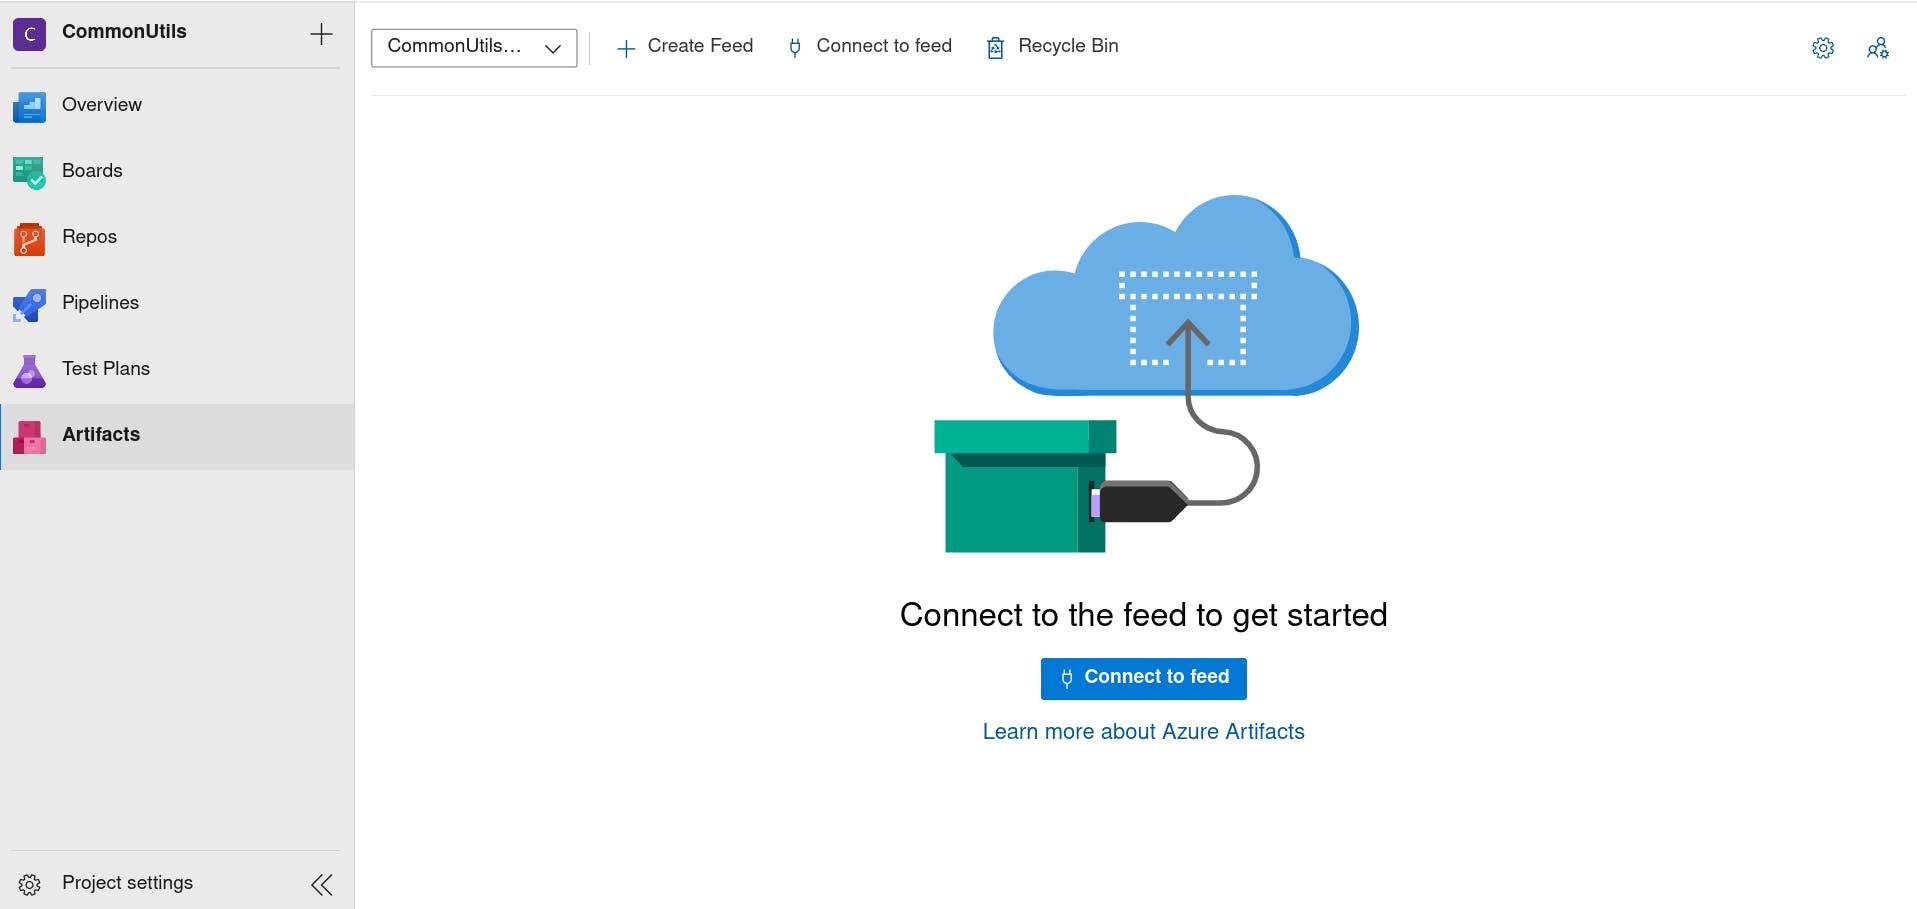
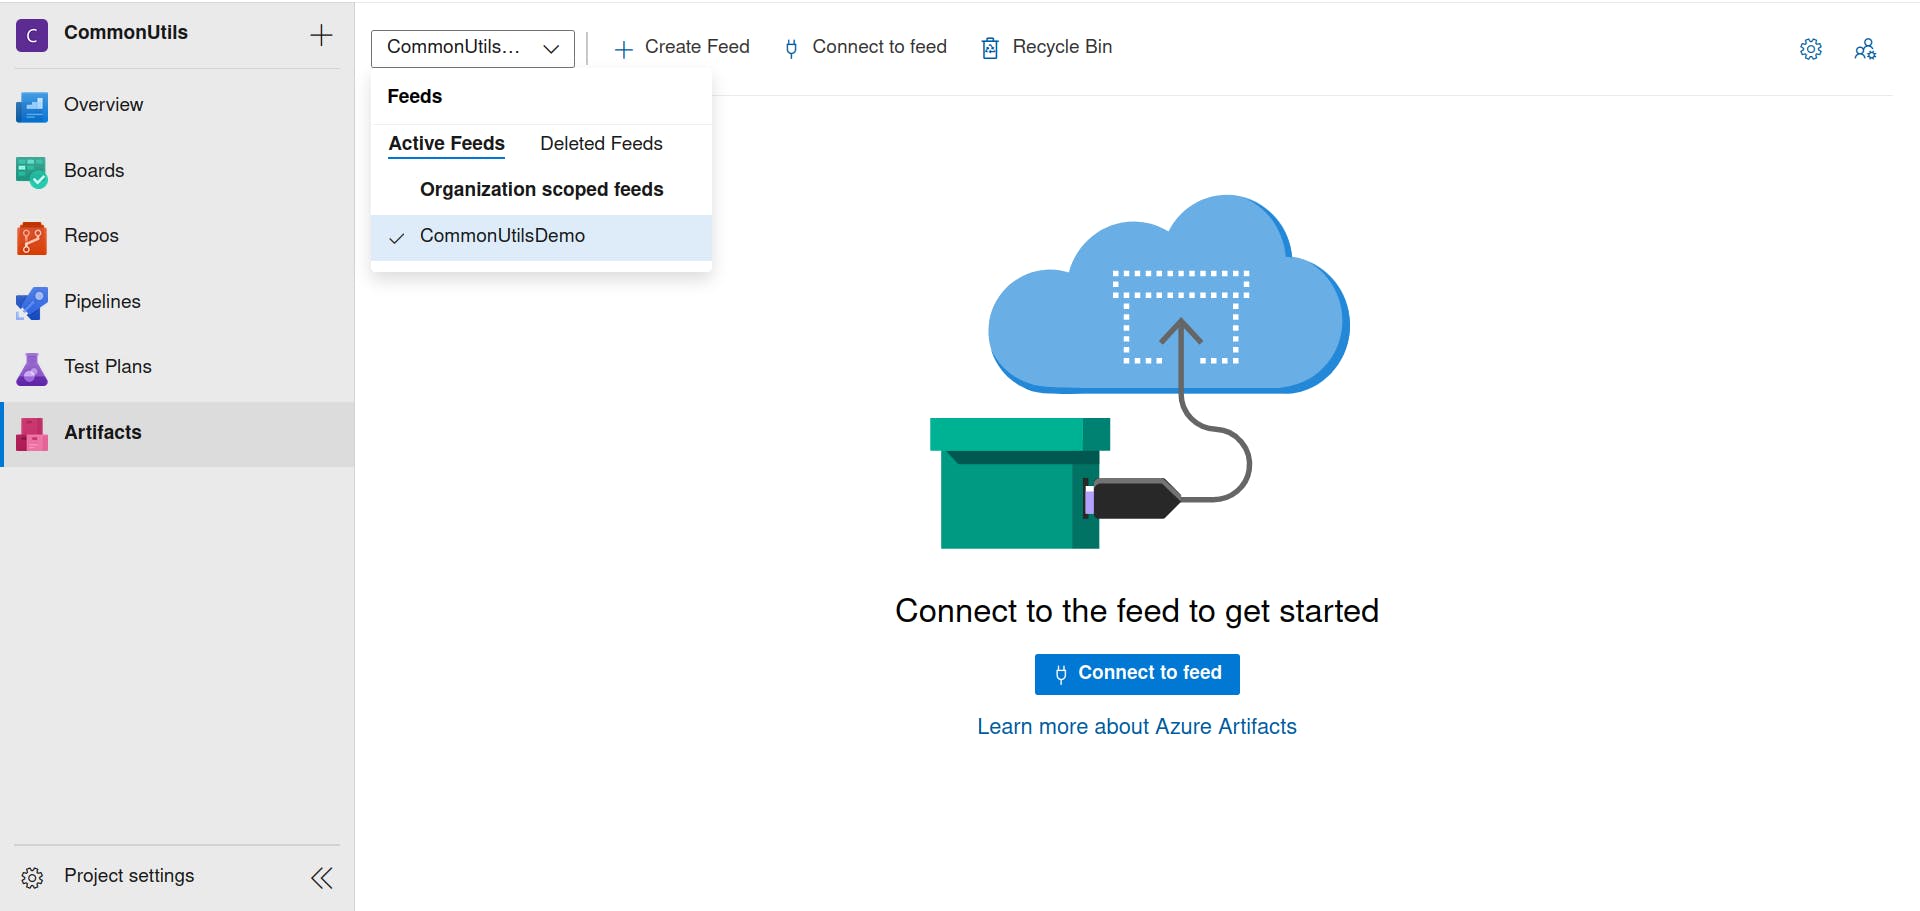
Click on the Artifacts from the left side menu and you will enter the landing page of the Artifacts which will contains all the Feeds you have in your project. By default the selected feed is called "CommonUtilsDemo" (which is a default feed that was created for the organization that this project is part of and the organization name is "CommonUtilsDemo" which was just created for the purpose of this article).
What is Azure Artifacts Feeds?
Artifacts Feeds are organizational constructs that allow you to store, manage, and group your packages and control who to share it with. Feeds are not package-type dependent. You can store all the following package types in a single feed: npm, NuGet, Maven, Python, and Universal packages (check this guide for more details about Artifacts Feeds).
You can use the default feed for publishing your library or you can create a new one. For us we are going to use the default feed which is called "CommonUtilsDemo".
After you select your target feed from the menu next to "Create Feed" button, you will see a message encouraging you to connect to the feed and underneath it a button labeled with "Connect to feed".
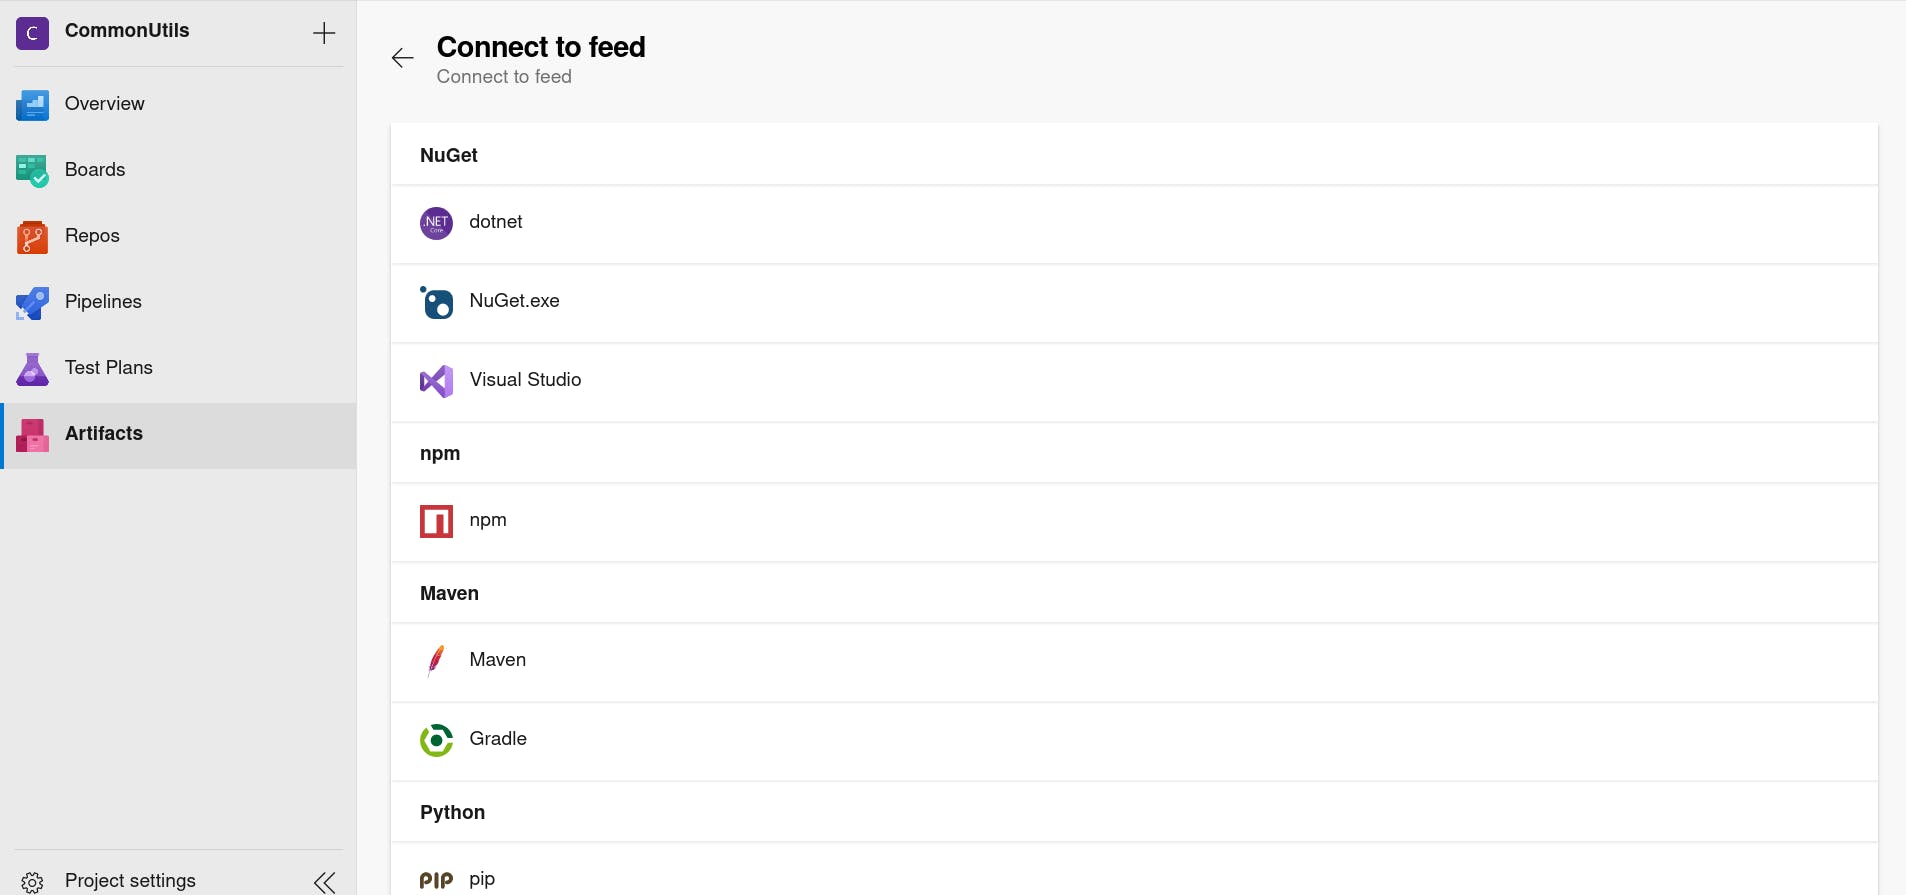
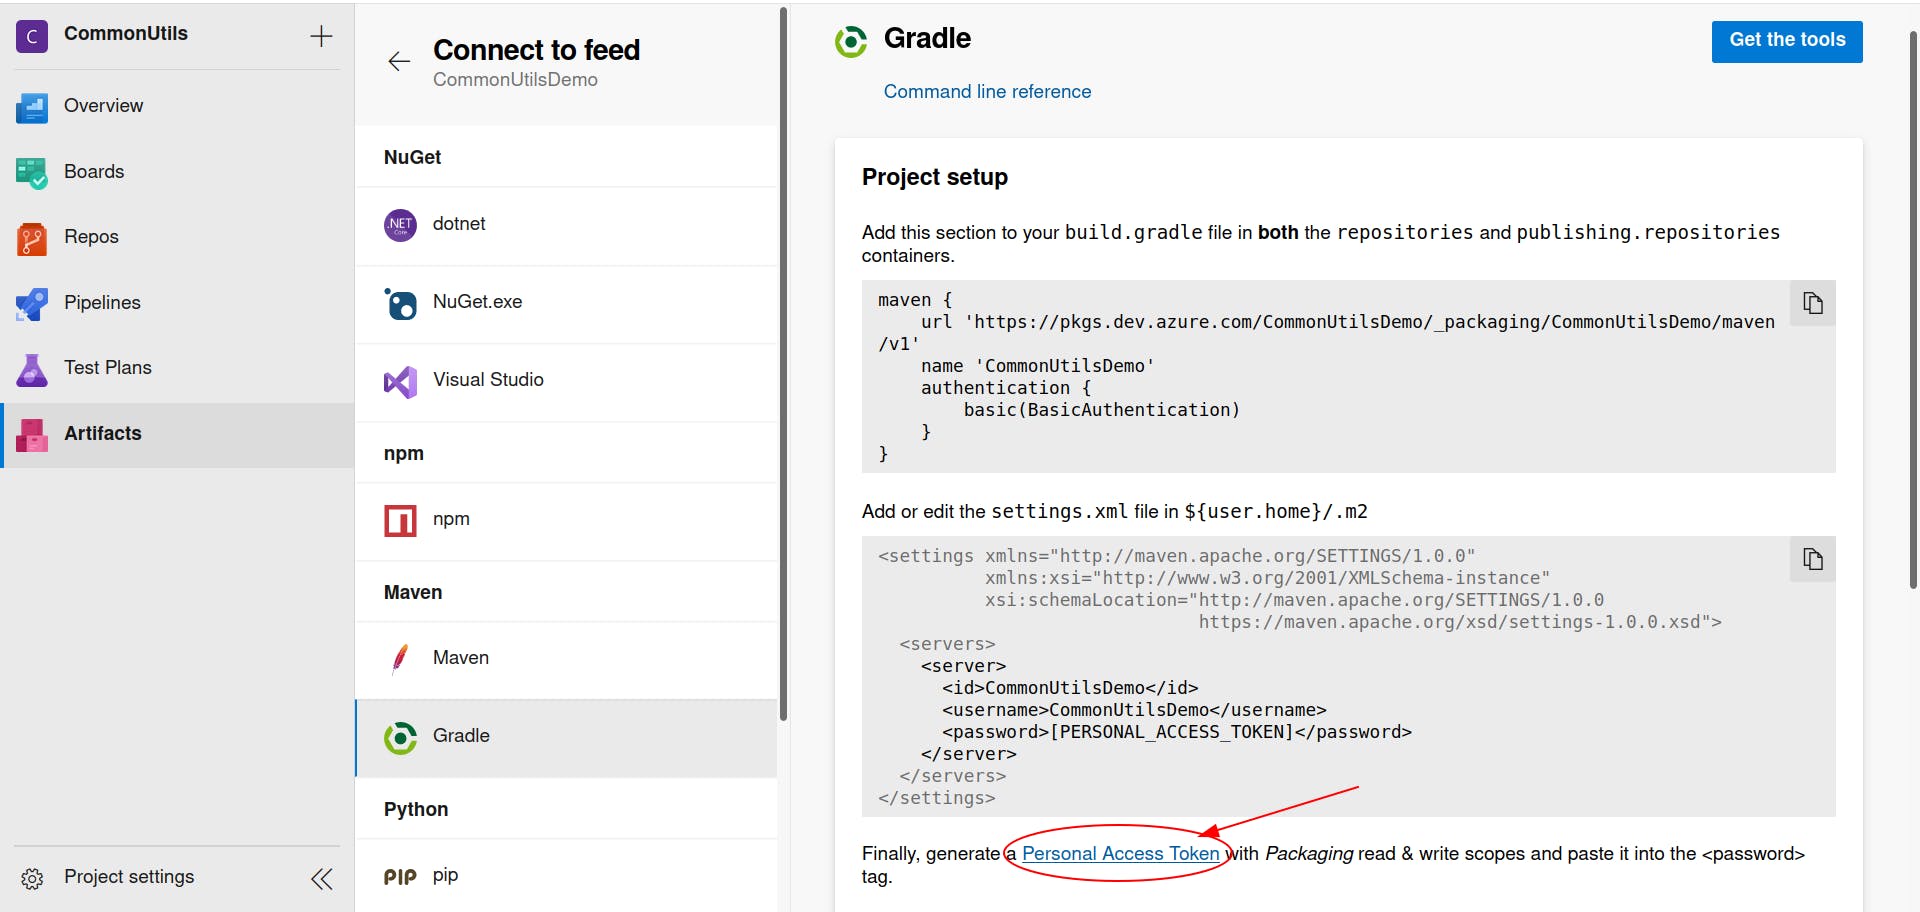
 When you click on this button, you will get a list of artifact types to select from. Under the Maven section you will find Gradle and Maven, Click on Gradle.
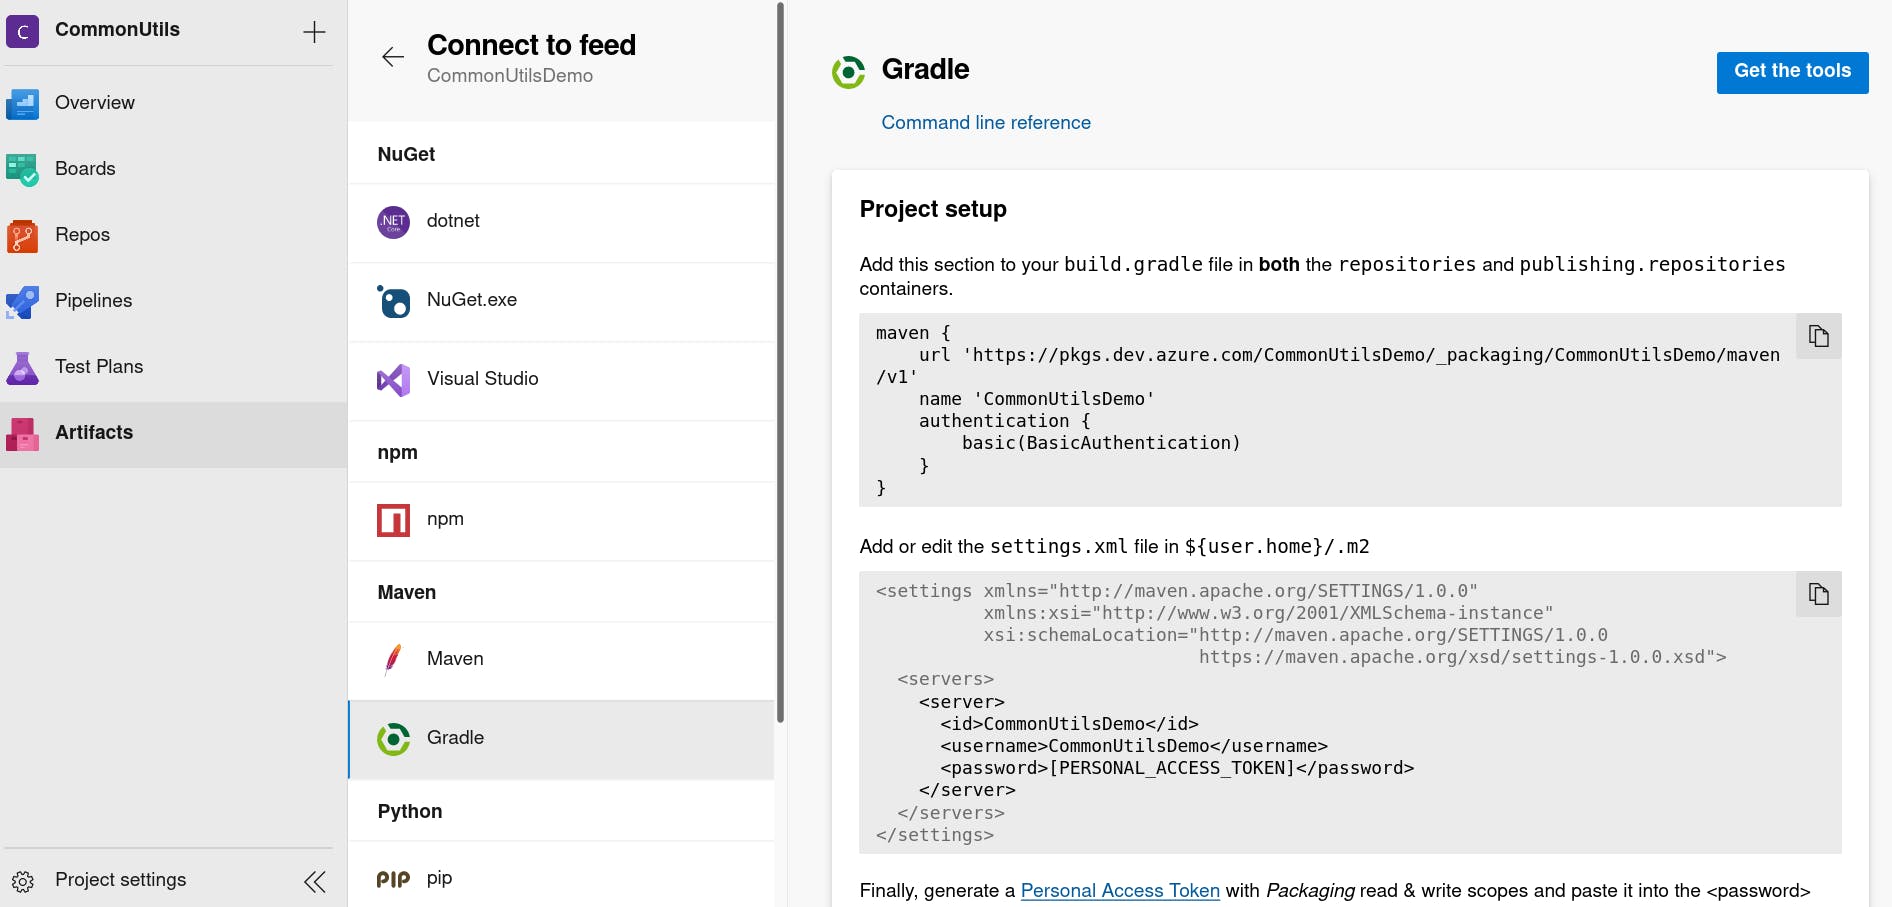
When you Click on Gradle, you will get a project setup guide opened in the right side of the page. From the setup instructions inside the maven{} block you will find a url and a name variables with values, save those values as we will need them to configure the the maven{} block in the repositories block we added.
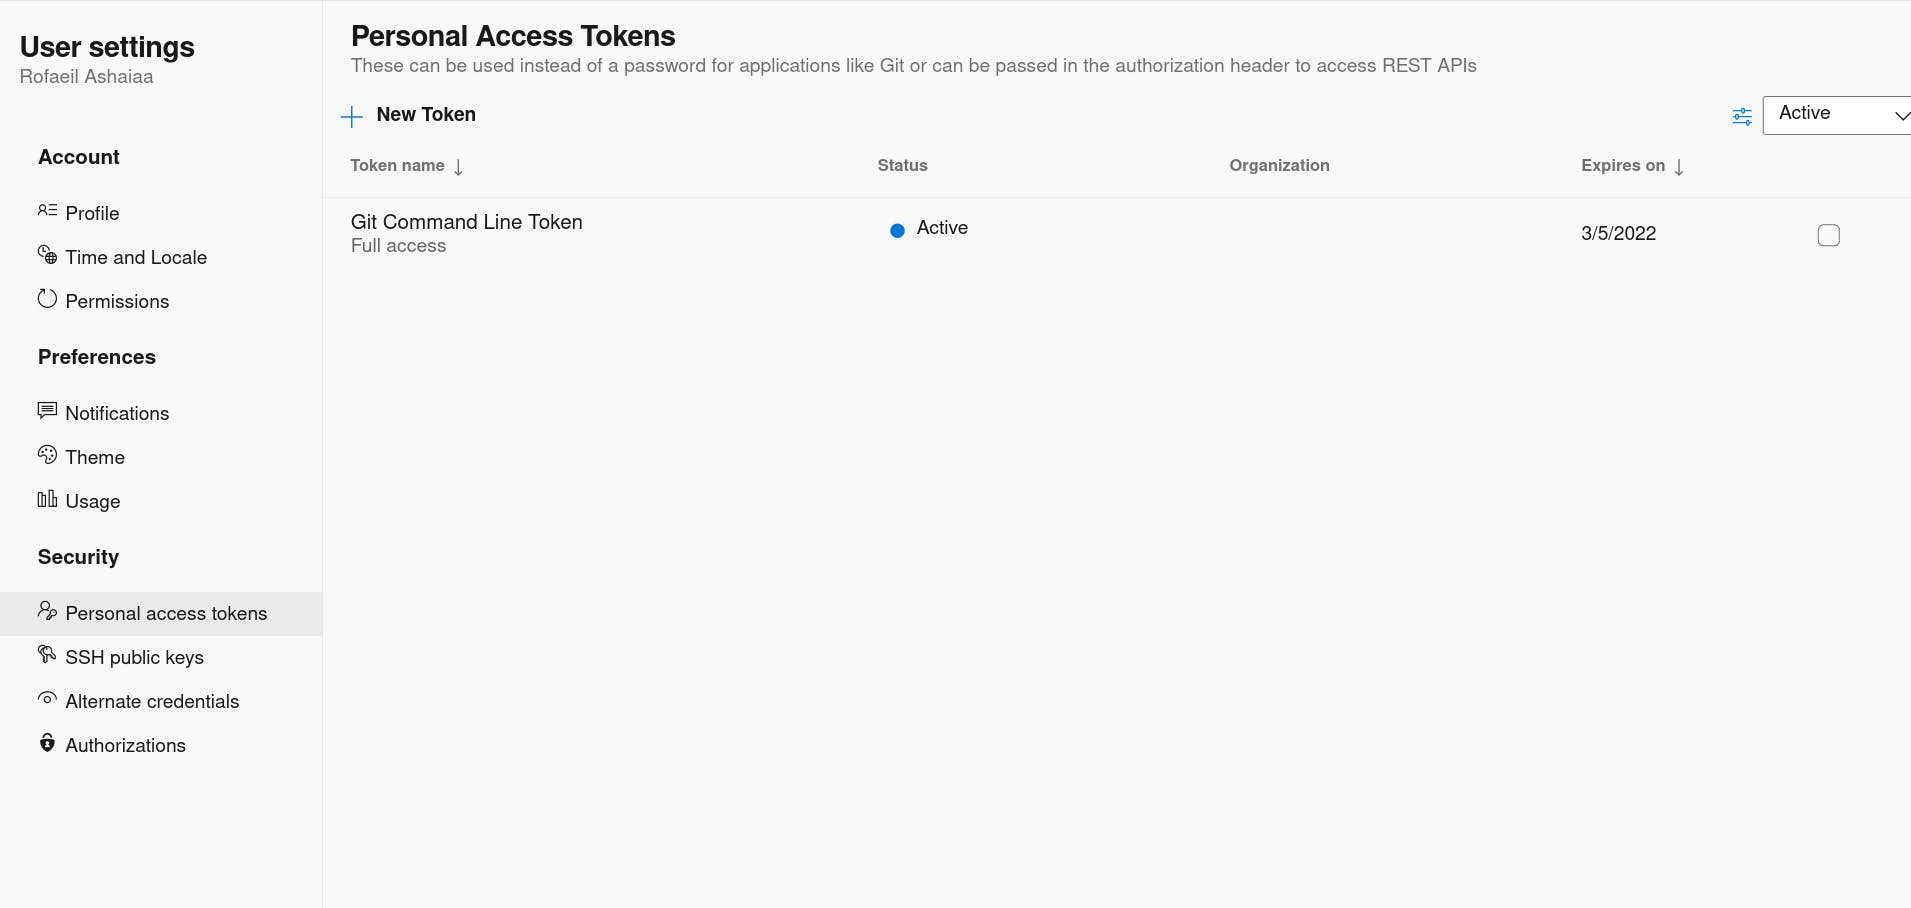
You need to create a personal access token (which we are going to use in the authentication when we want to publish the android library on azure artifacts or when gradle wants to download it as a dependency). To do that you can access your personal token from the same setup instruction that opened in the right side of the page in the previous step and you will be redirected to the Personal Access Tokens page to create a new one or you can follow this guide to create a new Personal Access token.
After you create the personal access token please save it along with the url and name values we saved from the previous step as we will need them later.
Open Android studio and under the root directory of your project create a new file called "azure-configs.properties". After creating this file paste the following content inside of it after replacing the value of the [name of your feed], [personal access token] and the [url of the feed] with the values you saved from the previous two steps.
 azureMavenAccessToken=[you personal access token]
 userName=[name of the feed]
 repositoryUrl=[url of the feed]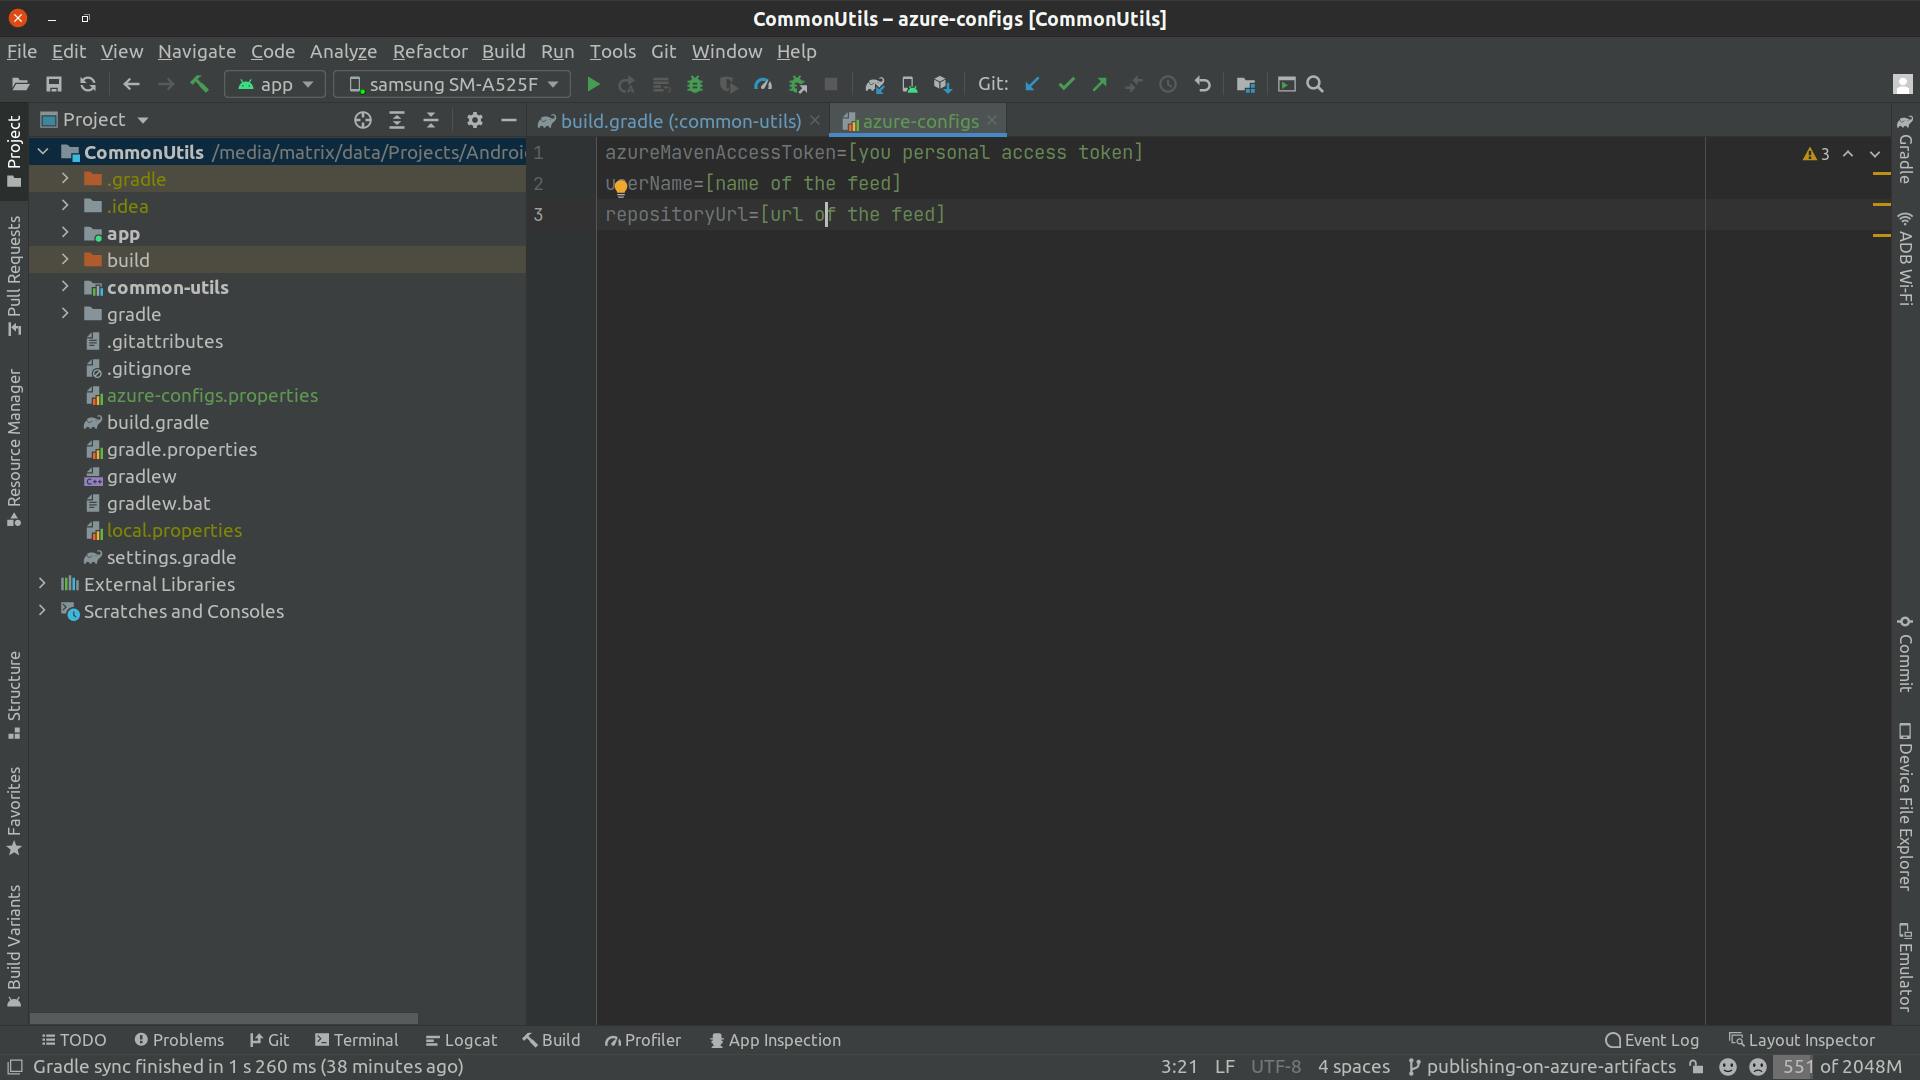
When you replace the values in this file with values you saved you should get a similar result to the following content:
 azureMavenAccessToken=r6qezlulkov72amh2kzbhhkuzulgssbecqlw4k3enttdcnx5hlza
 userName=CommonUtilsDemo
 repositoryUrl=https://pkgs.dev.azure.com/CommonUtilsDemo/_packaging/CommonUtilsDemo/maven/v1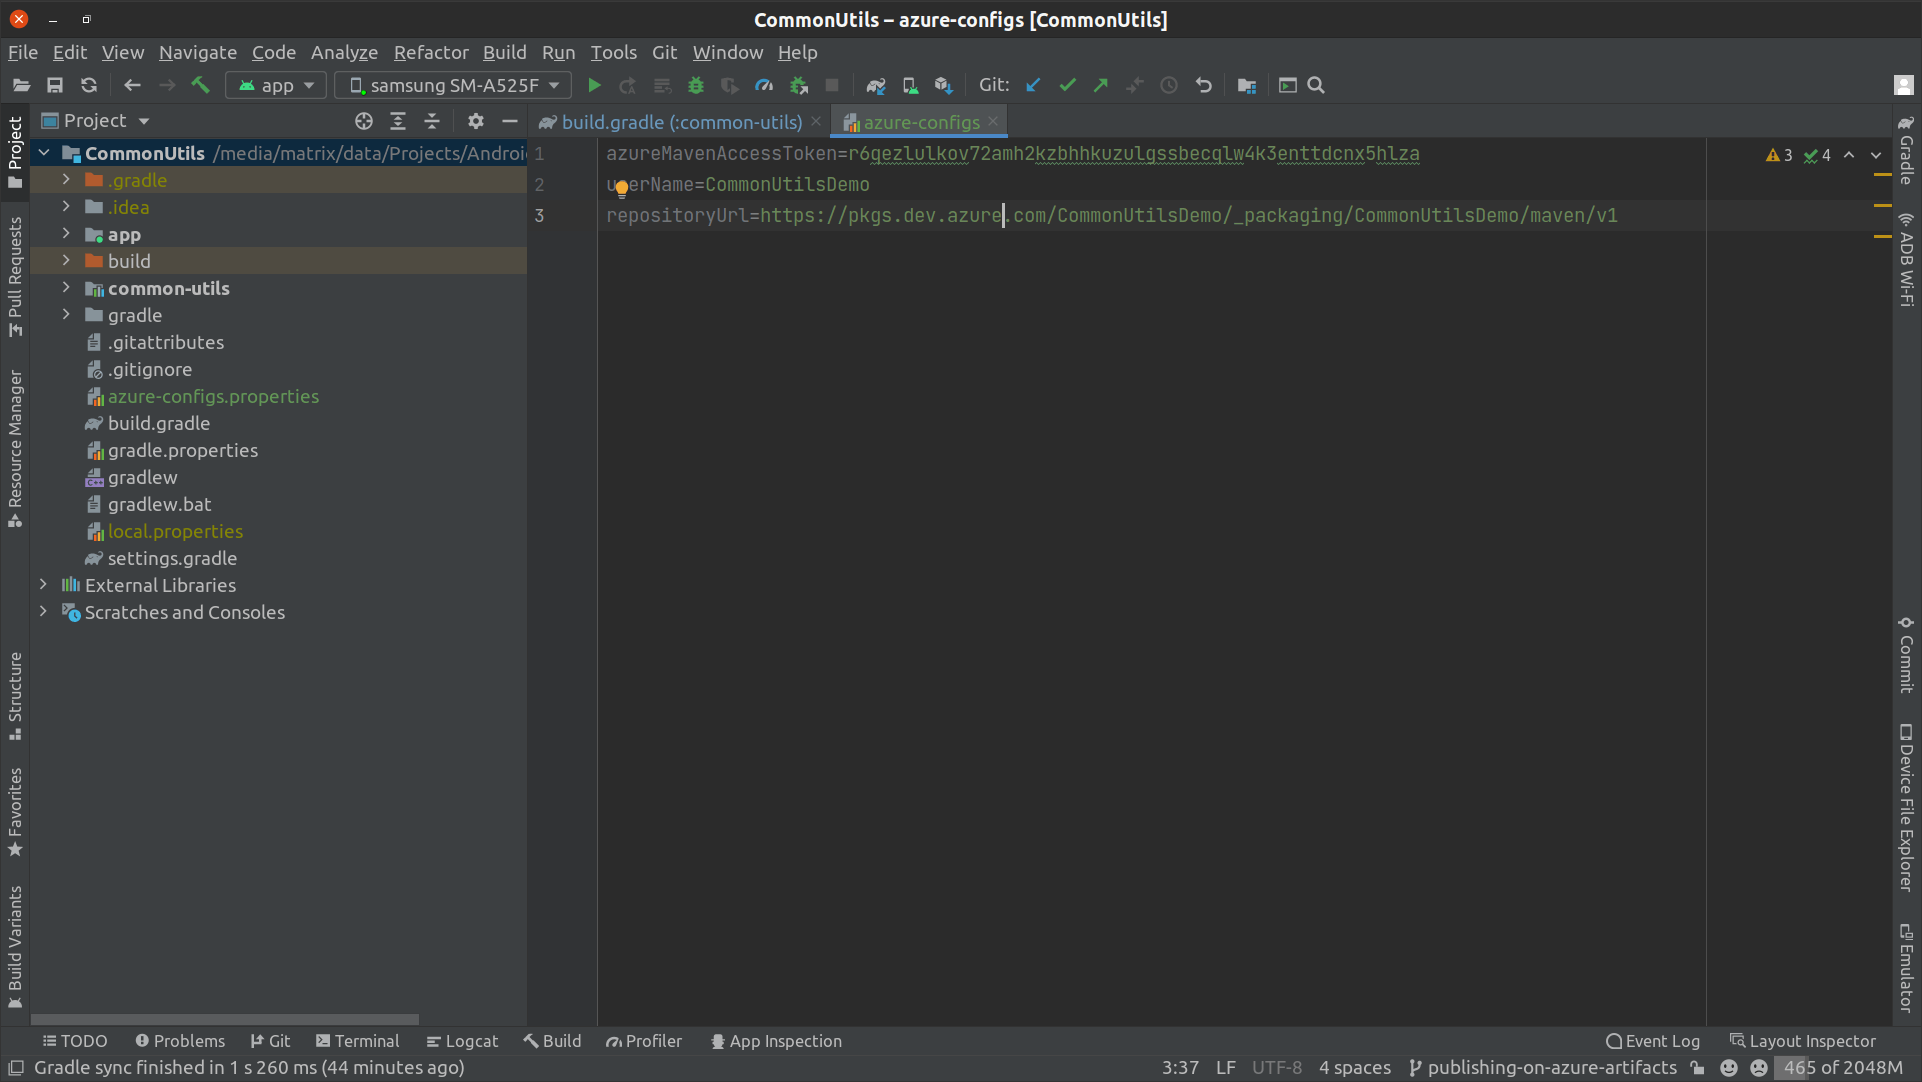
Note: Don't try to use the personal access token as it's created for the purpose of this article only and deleted right after I finished the article for security reasons off course ;)
After you created the file "azure-configs.properties", Open the build.gradle file of the "common-utils" library module and add the following code right after the plugins block (which loads the values of the file we created "azure-configs.properties" in order to be able to use them in gradle script inside the publishing block and that what we are going to do next).
 def keystorePropertiesFile = rootProject.file("azure-configs.properties")
 def keystoreProperties = new Properties()
 keystoreProperties.load(new FileInputStream(keystorePropertiesFile))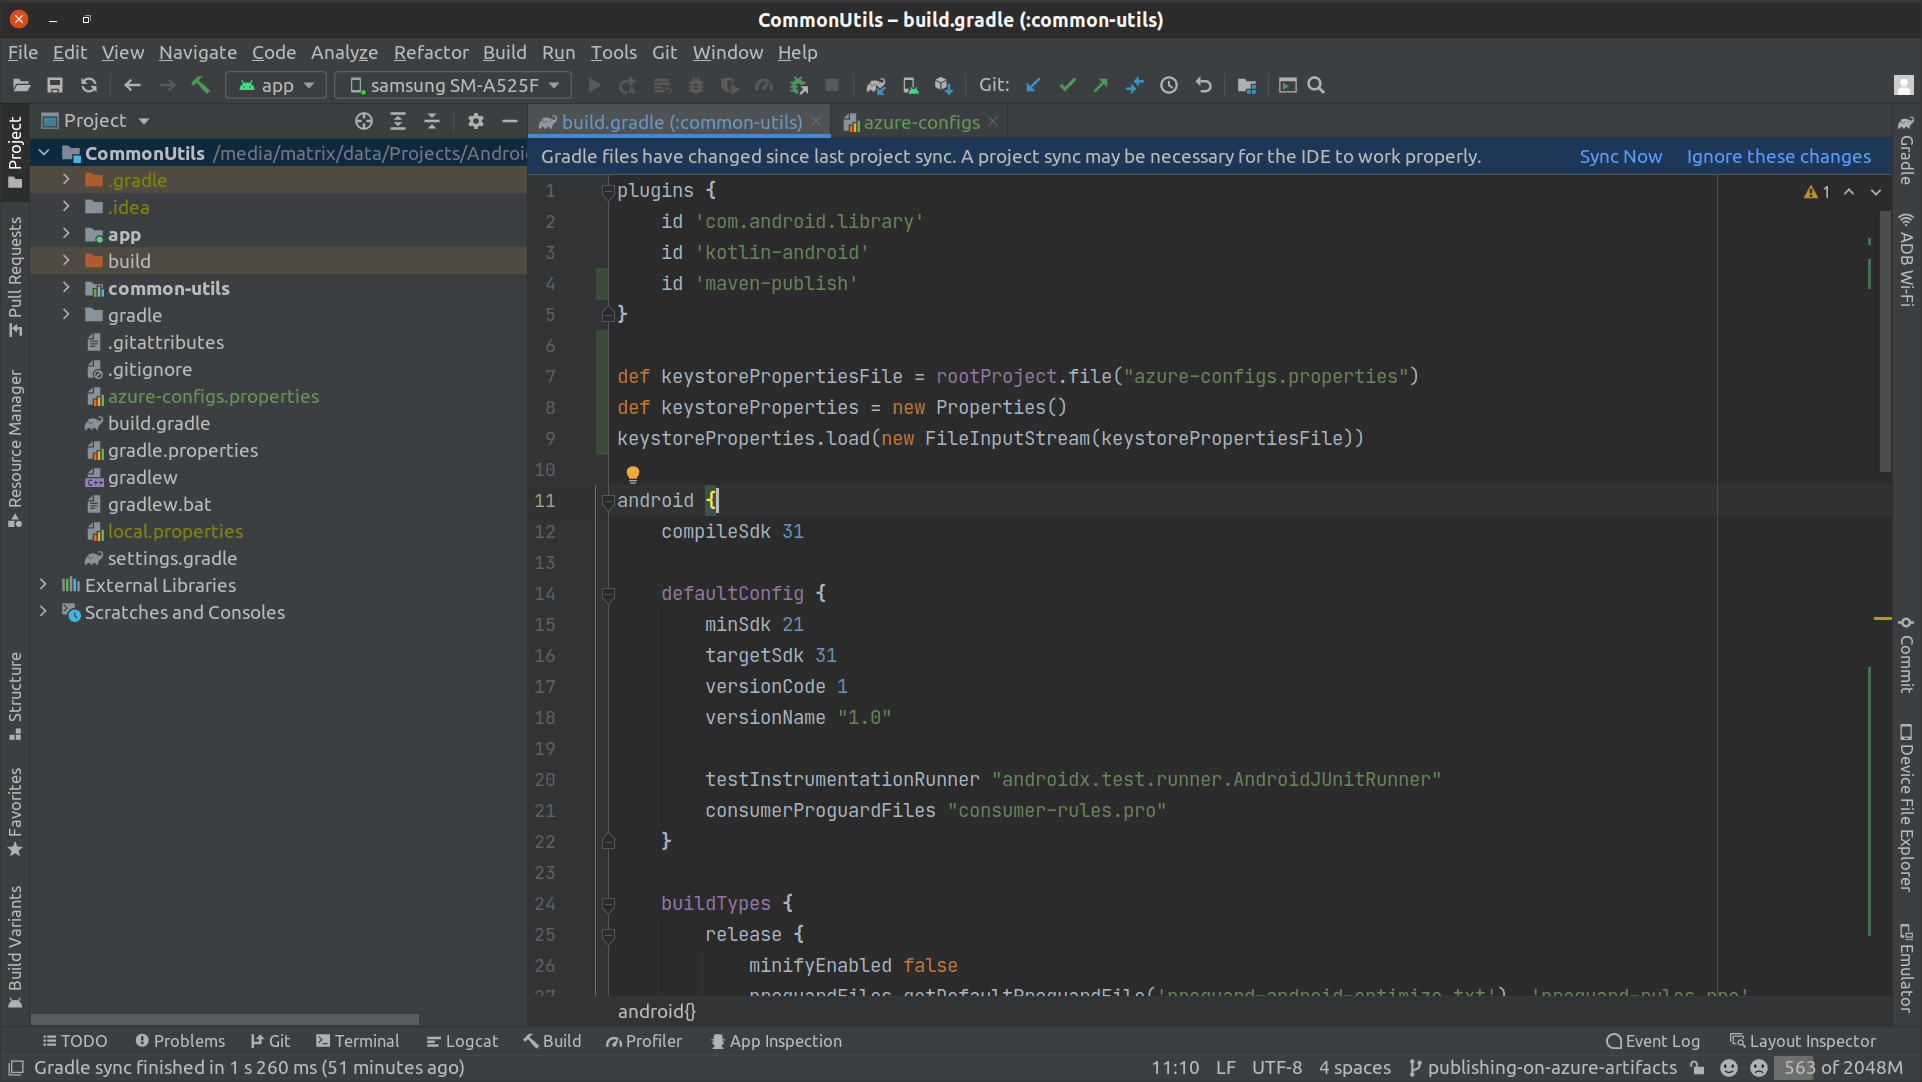
Note: you shouldn't check the "azure-configs.properties" in version control because doing so expose the personal access token specially if it's an open source project. I only did that to provide the readers of this article with complete sample project which includes this file.
Open the build.gradle file of the "common-utils" library module and add the following code right inside the maven block ( which is inside the repositories block inside the publishing block inside the afterEvaluate block).
 maven {
                 name = 'azure'
                 url keystoreProperties['repositoryUrl']
                 credentials {
                     username keystoreProperties['userName']
                     password keystoreProperties['azureMavenAccessToken']
                 }
             }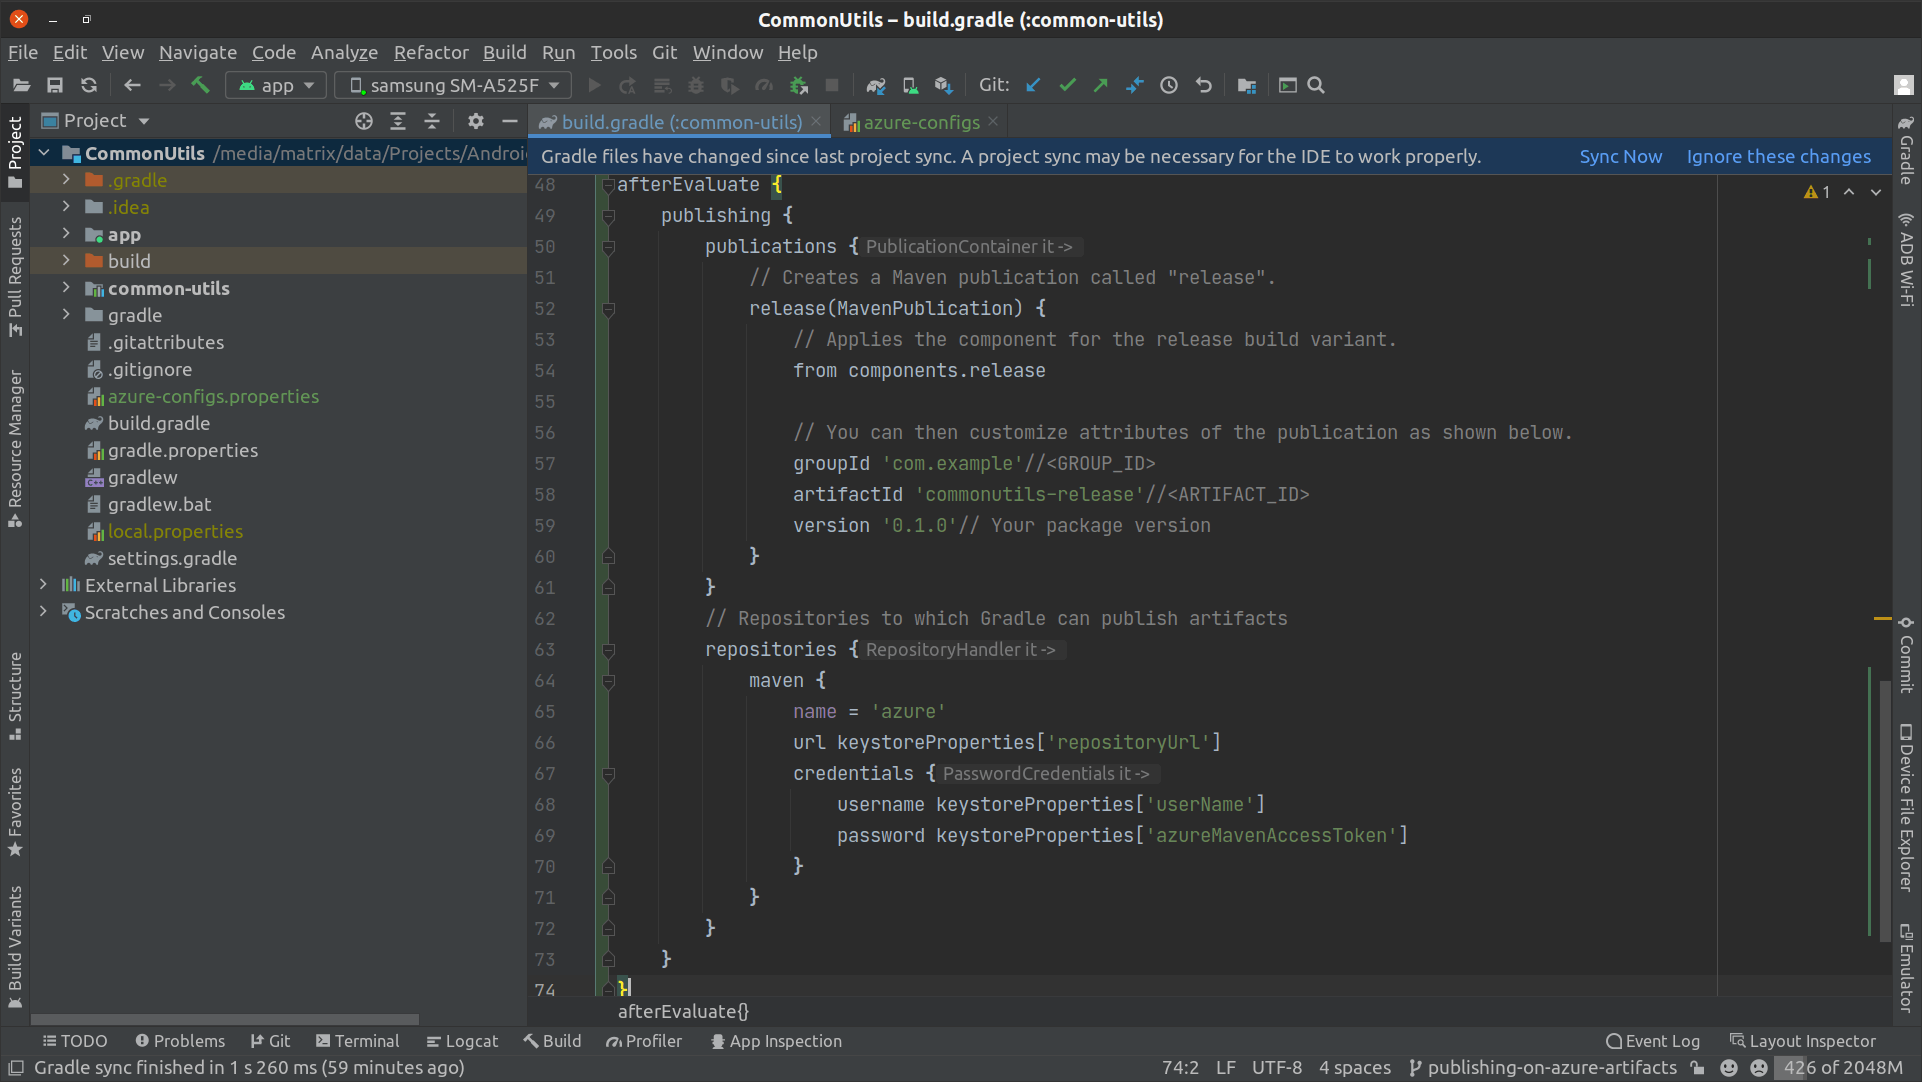
By adding this block of code we have enabled the gradle build script to read the values from the file we created and use them with the maven publish gradle plugin in the publishing block.
Don't forget to click on "Sync Now" when prompted by android studio!
Congrats!, you have configured the Azure Artifacts on Azure DevOps, prepared it to host a maven repository and added the configuration to the maven publish gradle plugin in order to be able to publish your existing android library on Azure Artifacts which we are going to do the next section.
Publishing the Android Library to Azure Artifacts
I know you are excited to see how all of this connects to publishing the android library but before we do that we need to go through some concepts we skipped earlier.
The Maven Publish Plugin uses an extension on the project named publishing of type PublishingExtension which we used previously when we added the publishing block with publications and the repositories block. The Maven Publish Plugin provides some gradle tasks to work with publishing and to provide the capabilities that we are going to use. So let's explore this tasks and what is the usage of each one as they are defined by the official docs as the following:
generatePomFileForPubNamePublication — GenerateMavenPom Creates a POM file for the publication named PubName, populating the known metadata such as project name, project version, and the dependencies. The default location for the POM file is build/publications/$pubName/pom-default.xml.
publishPubNamePublicationToRepoNameRepository — PublishToMavenRepository Publishes the PubName publication to the repository named RepoName. If you have a repository definition without an explicit name, RepoName will be "Maven".
publish Depends on: All publishPubNamePublicationToRepoNameRepository tasks An aggregate task that publishes all defined publications to all defined repositories. It does not include copying publications to the local Maven cache.
To map this tasks to our exisiting android library we expect to have these tasks:
- generatePomFileForReleasePublication (because PubName = Release)
- publishReleasePublicationToAzureRepository (because PubName = Release and RepoName = Azure)
- publish
And we are only interested in the publishReleasePublicationToAzureRepository which we are going to use to demonstrate how to publish the library and to do that follow the next steps:
In Android Studio, Open the gradle tool window which includes all the gradle tasks in the 'root project', the gradle tasks in 'app' module and all the gradle tasks in the 'common-utils' module.
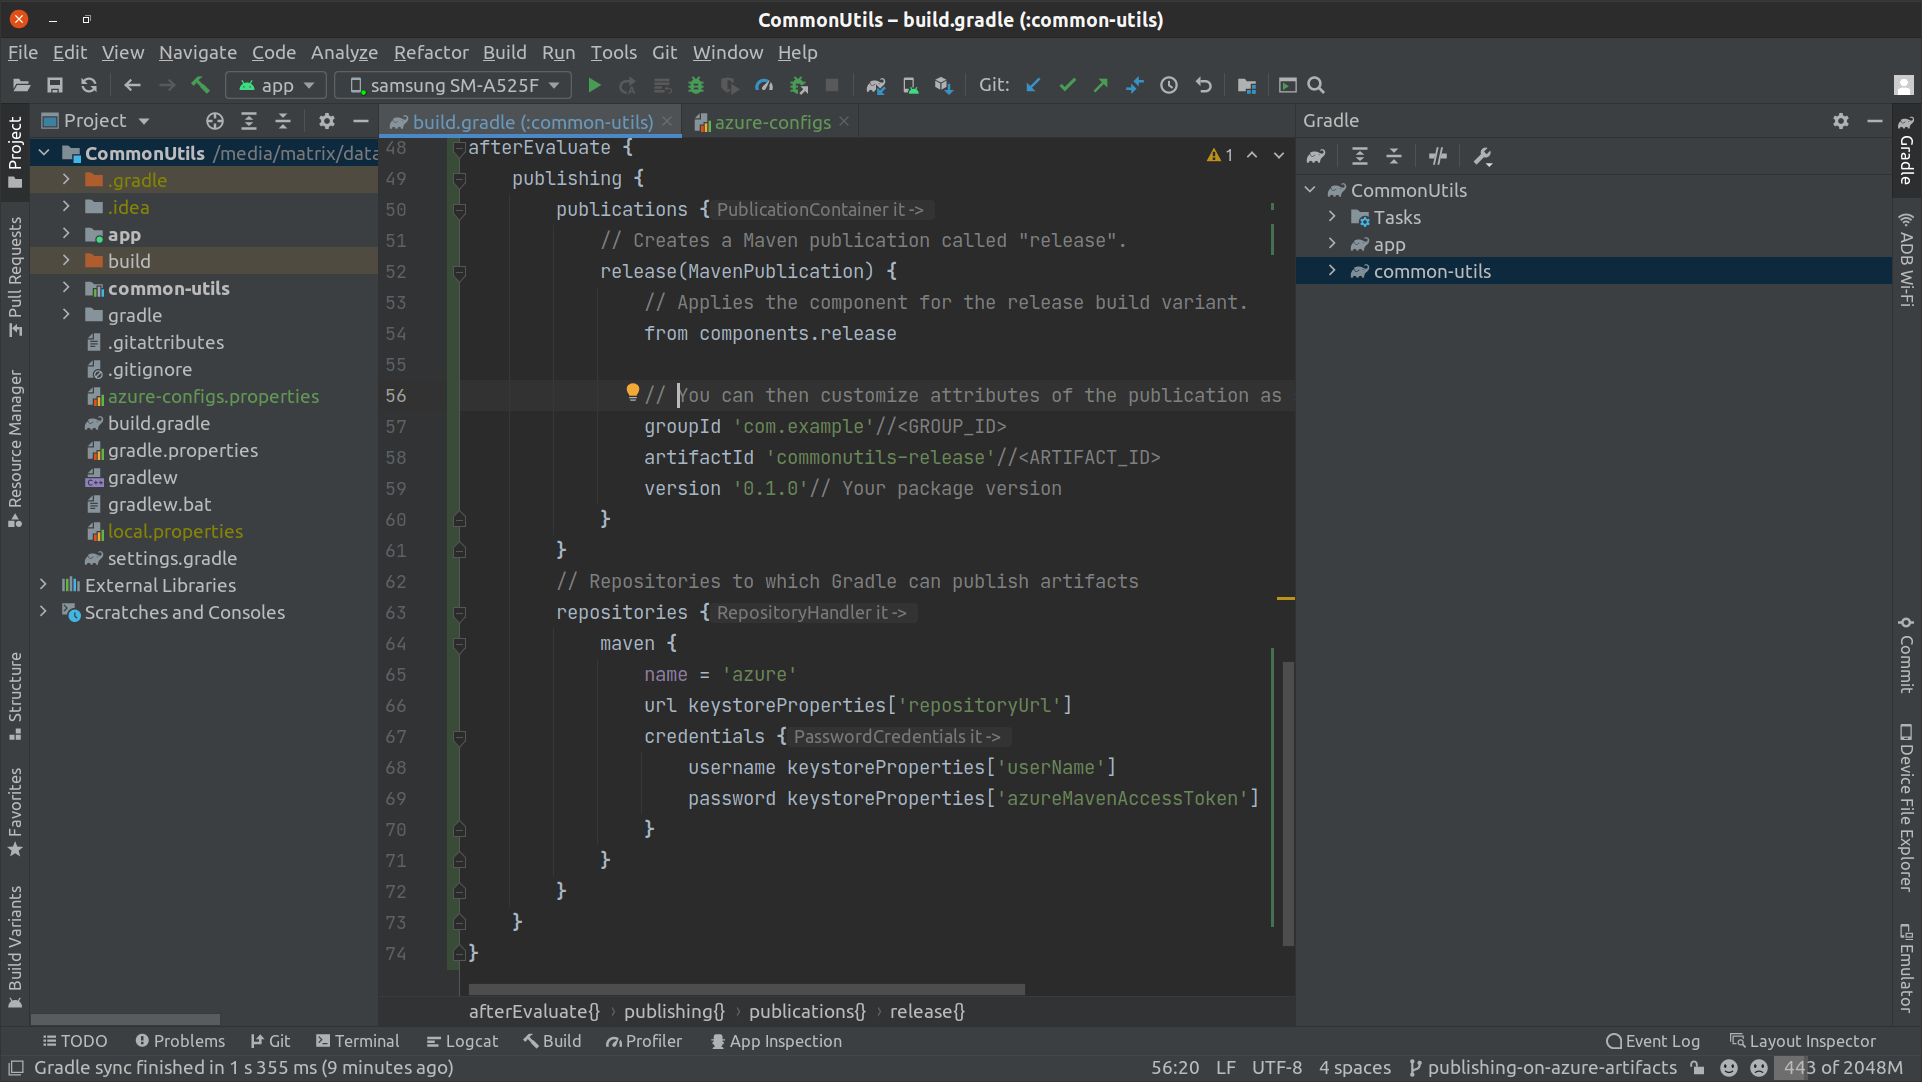
Click on the arrow next to 'common-utils' -> 'Tasks' -> 'Publishing'. You will find the tasks we mentioned before which the Maven Publish Gradle Plugin generate for us for the 'common-utils'. We can double click on any one of these tasks to trigger the gradle to execute this task or click on the task called 'publish' to trigger all the tasks.
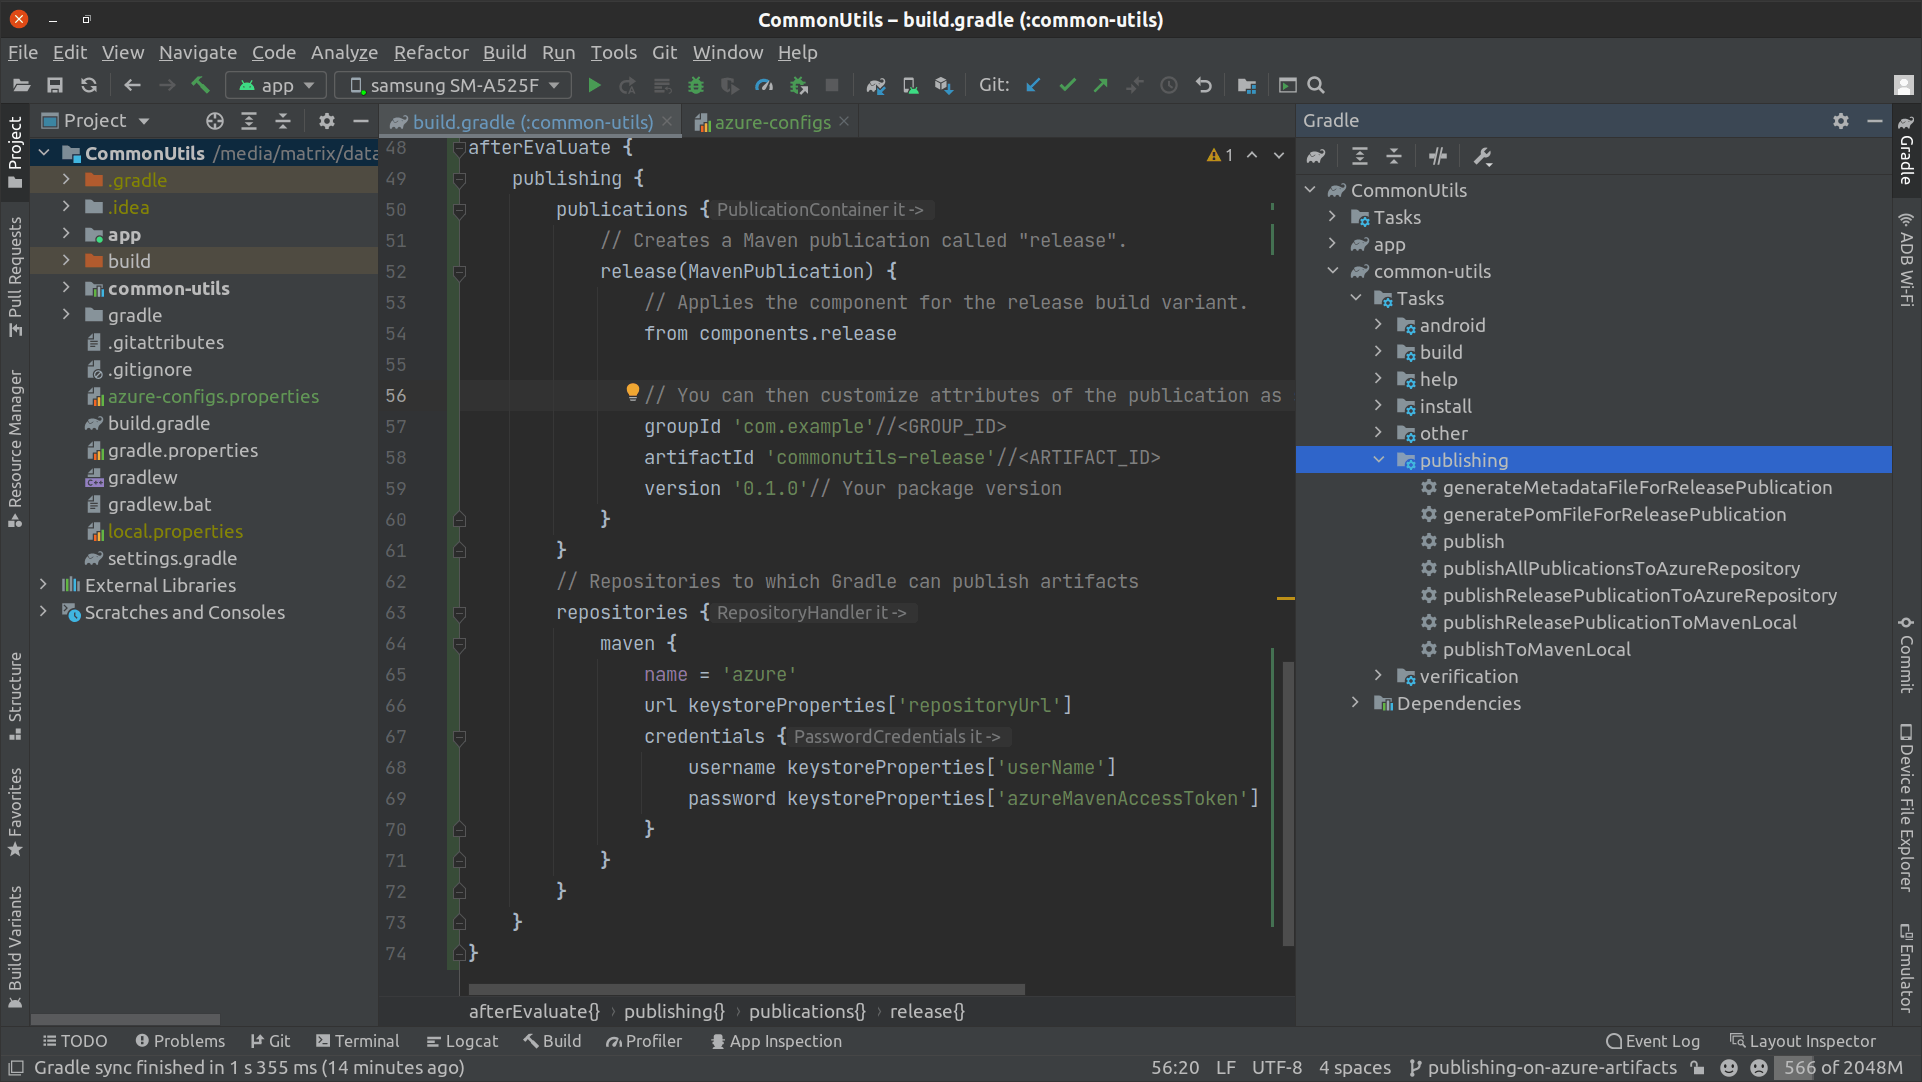
To publish our existing android library we will execute the task called 'publishReleasePublicationToAzureRepository' which will deploy the release build of our library (the AAR Release) to the Azure repository which we configured previously. We can execute this task by simpley double clicking on it from the opened gradle tool window (or by opening the terminal in the root project directory and run the command
./gradlew publishReleasePublicationToAzureRepository) which will build the android library and all the required files and publish it to Azure Artifacts.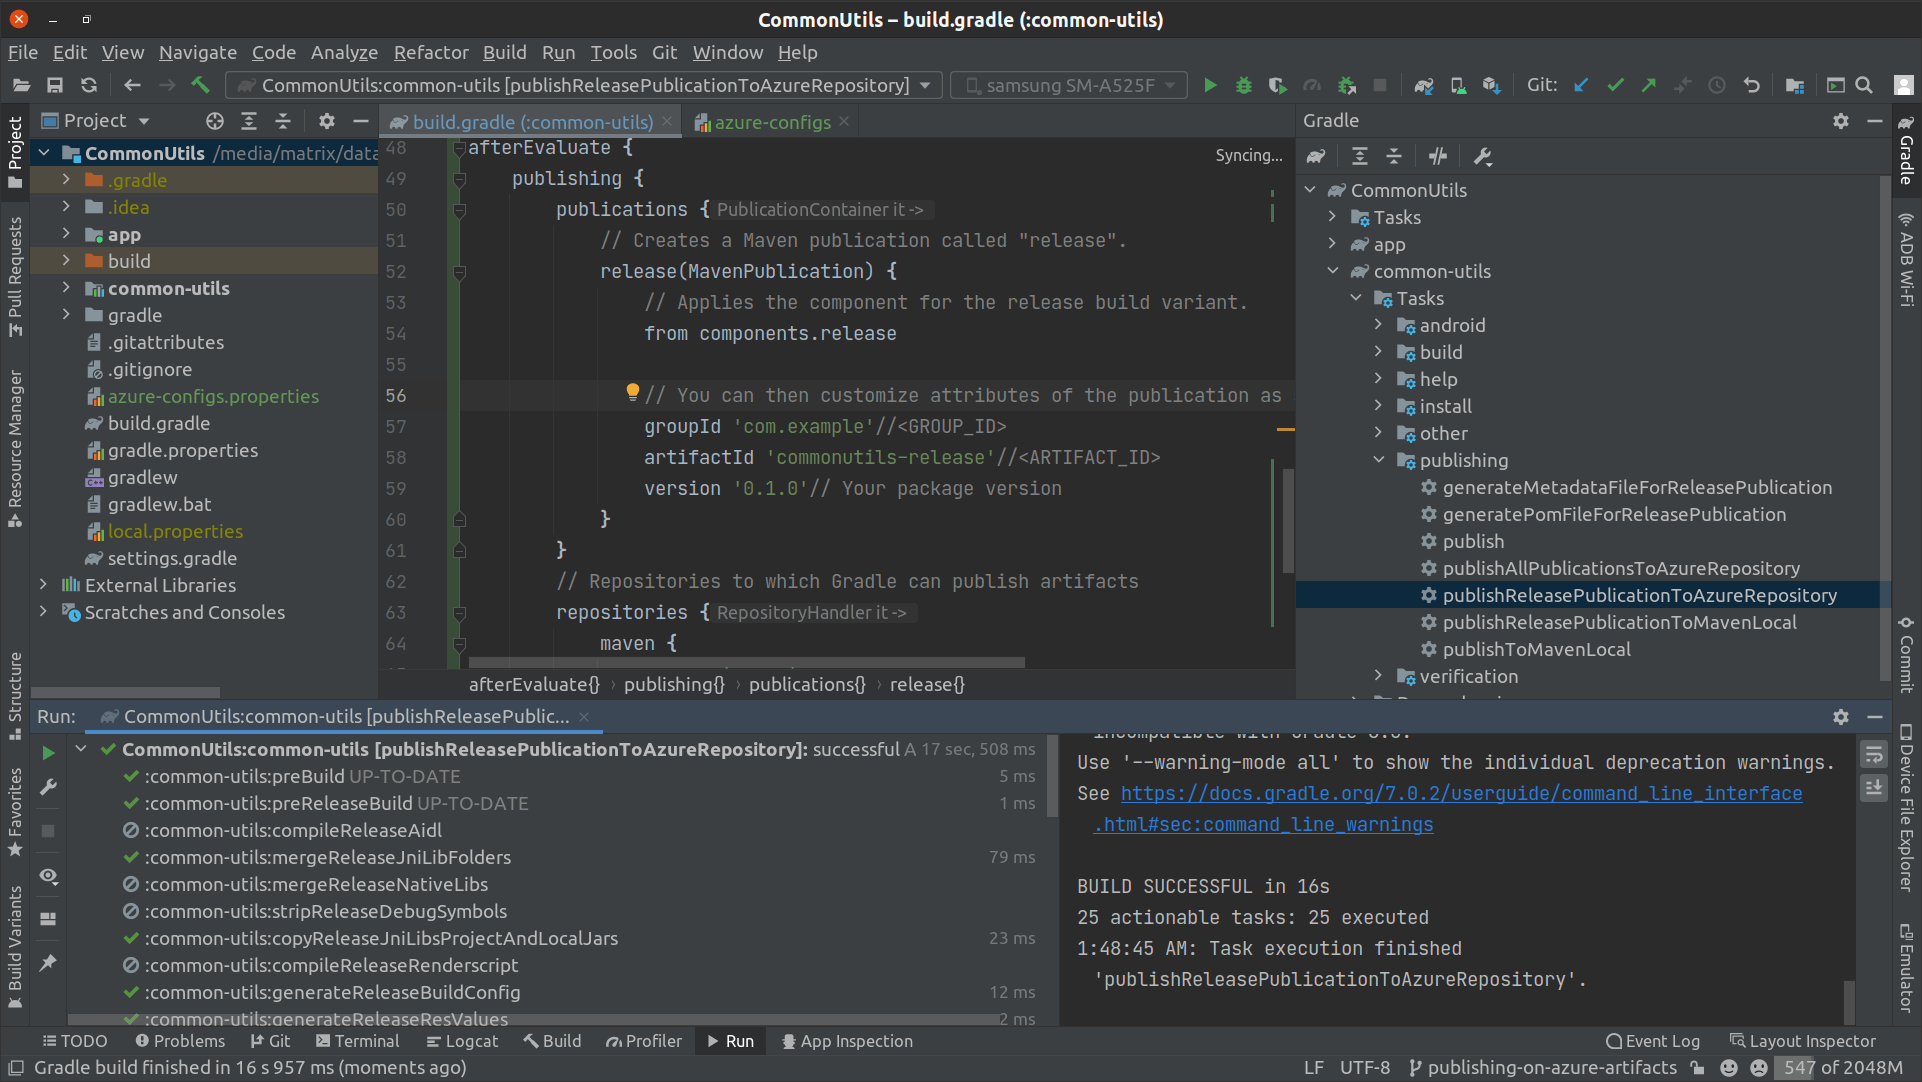
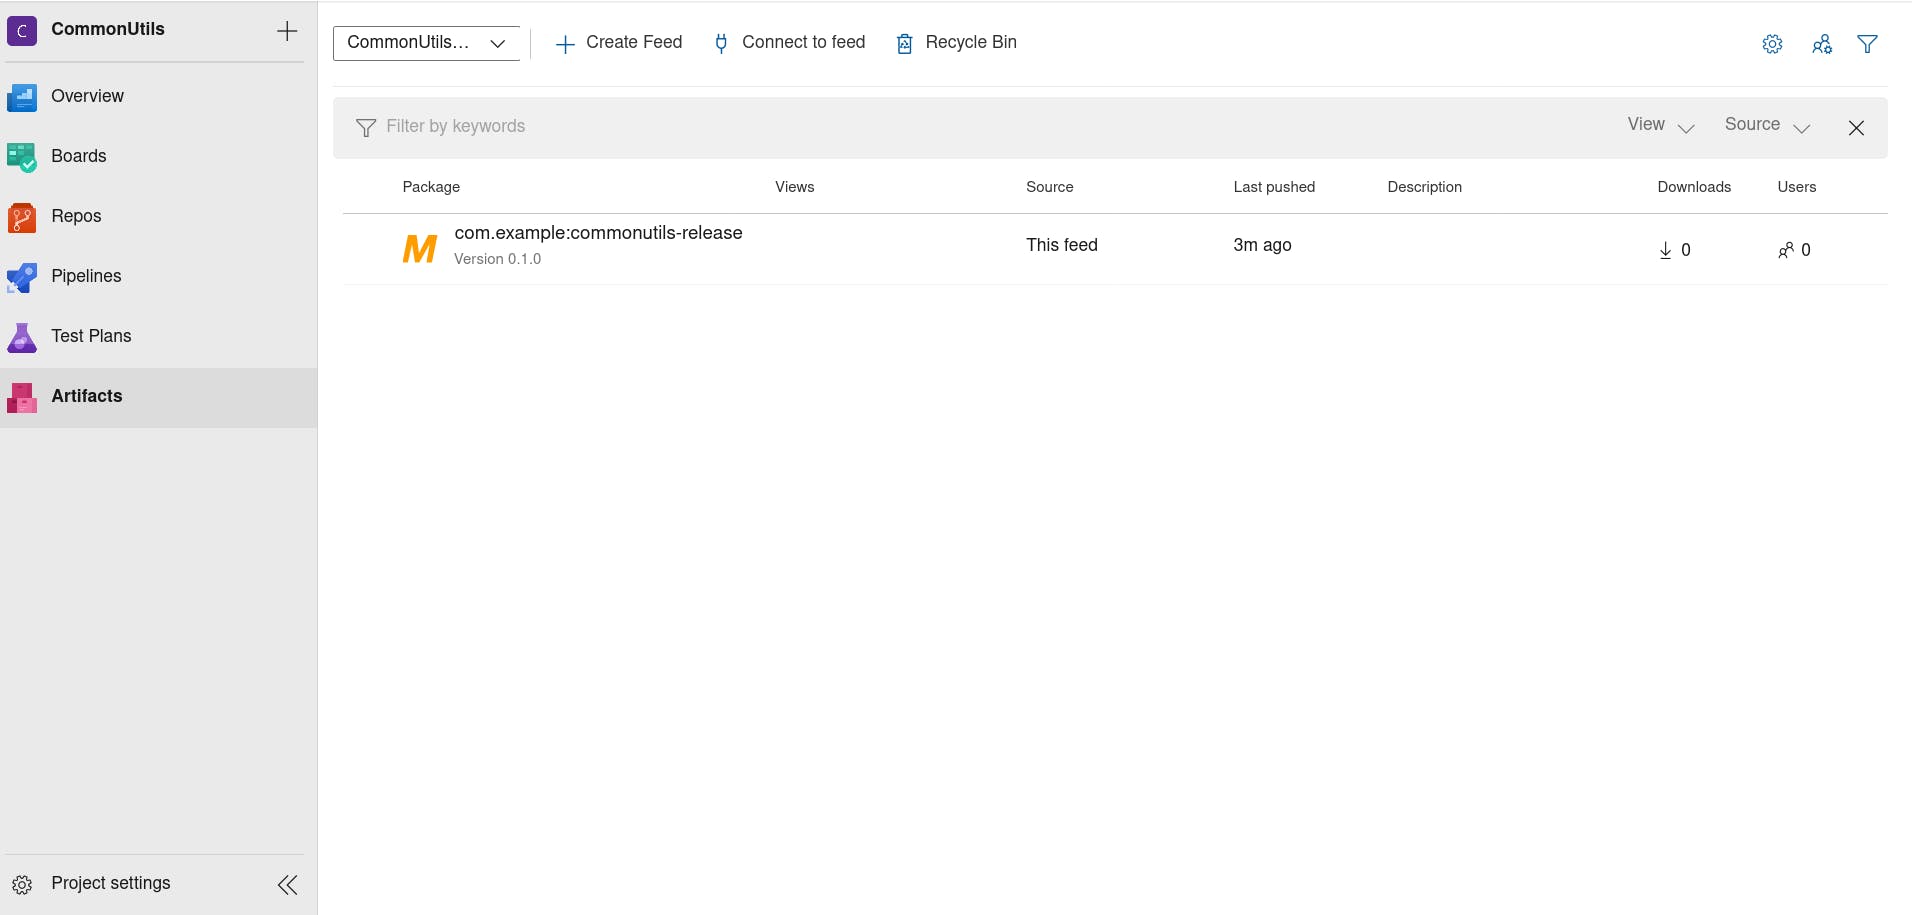
Navigate to your project that is called "CommonUtils" on Azure DevOps and open the Artifacts service and will find the published library as the following:
Congrats!, you have published your existing android library on Azure Artifacts and you can now use it in other android projects which we are going to do the next section.
Using the Published Android Library in Another App
To use the published android library in the app module we need to remove the local dependency on the 'common-utils' and replace it with the dependency on the published library on Azure Artifacts. To do that you can follow the next steps:
Open the 'settings.gradle' file and remove the dependencyResolutionManagement {} block if you have it. We do that in order to be able to define the repository block in the app module which we will do in the next step.
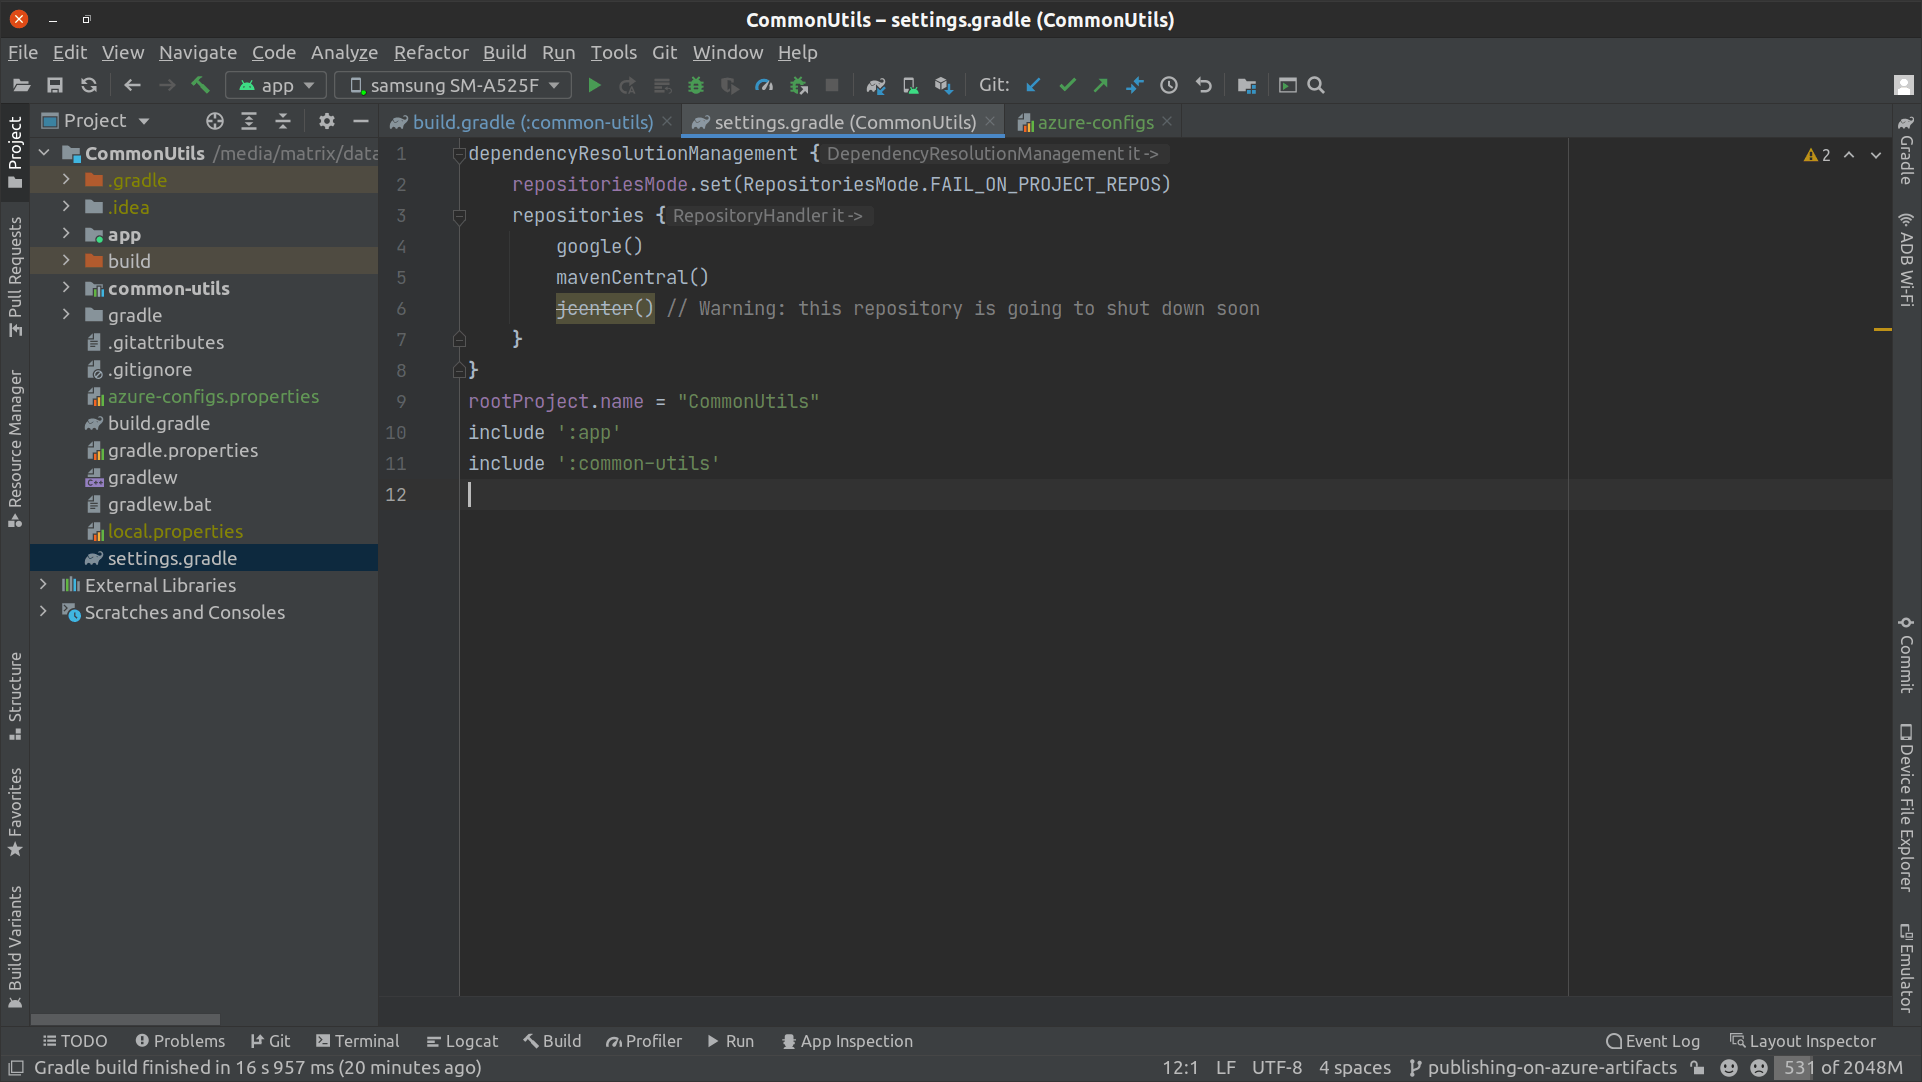
After removing the dependencyResolutionManagement {} block, your settings.gradle file should have only the following code
 rootProject.name = "CommonUtils"
 include ':app'
 include ':common-utils'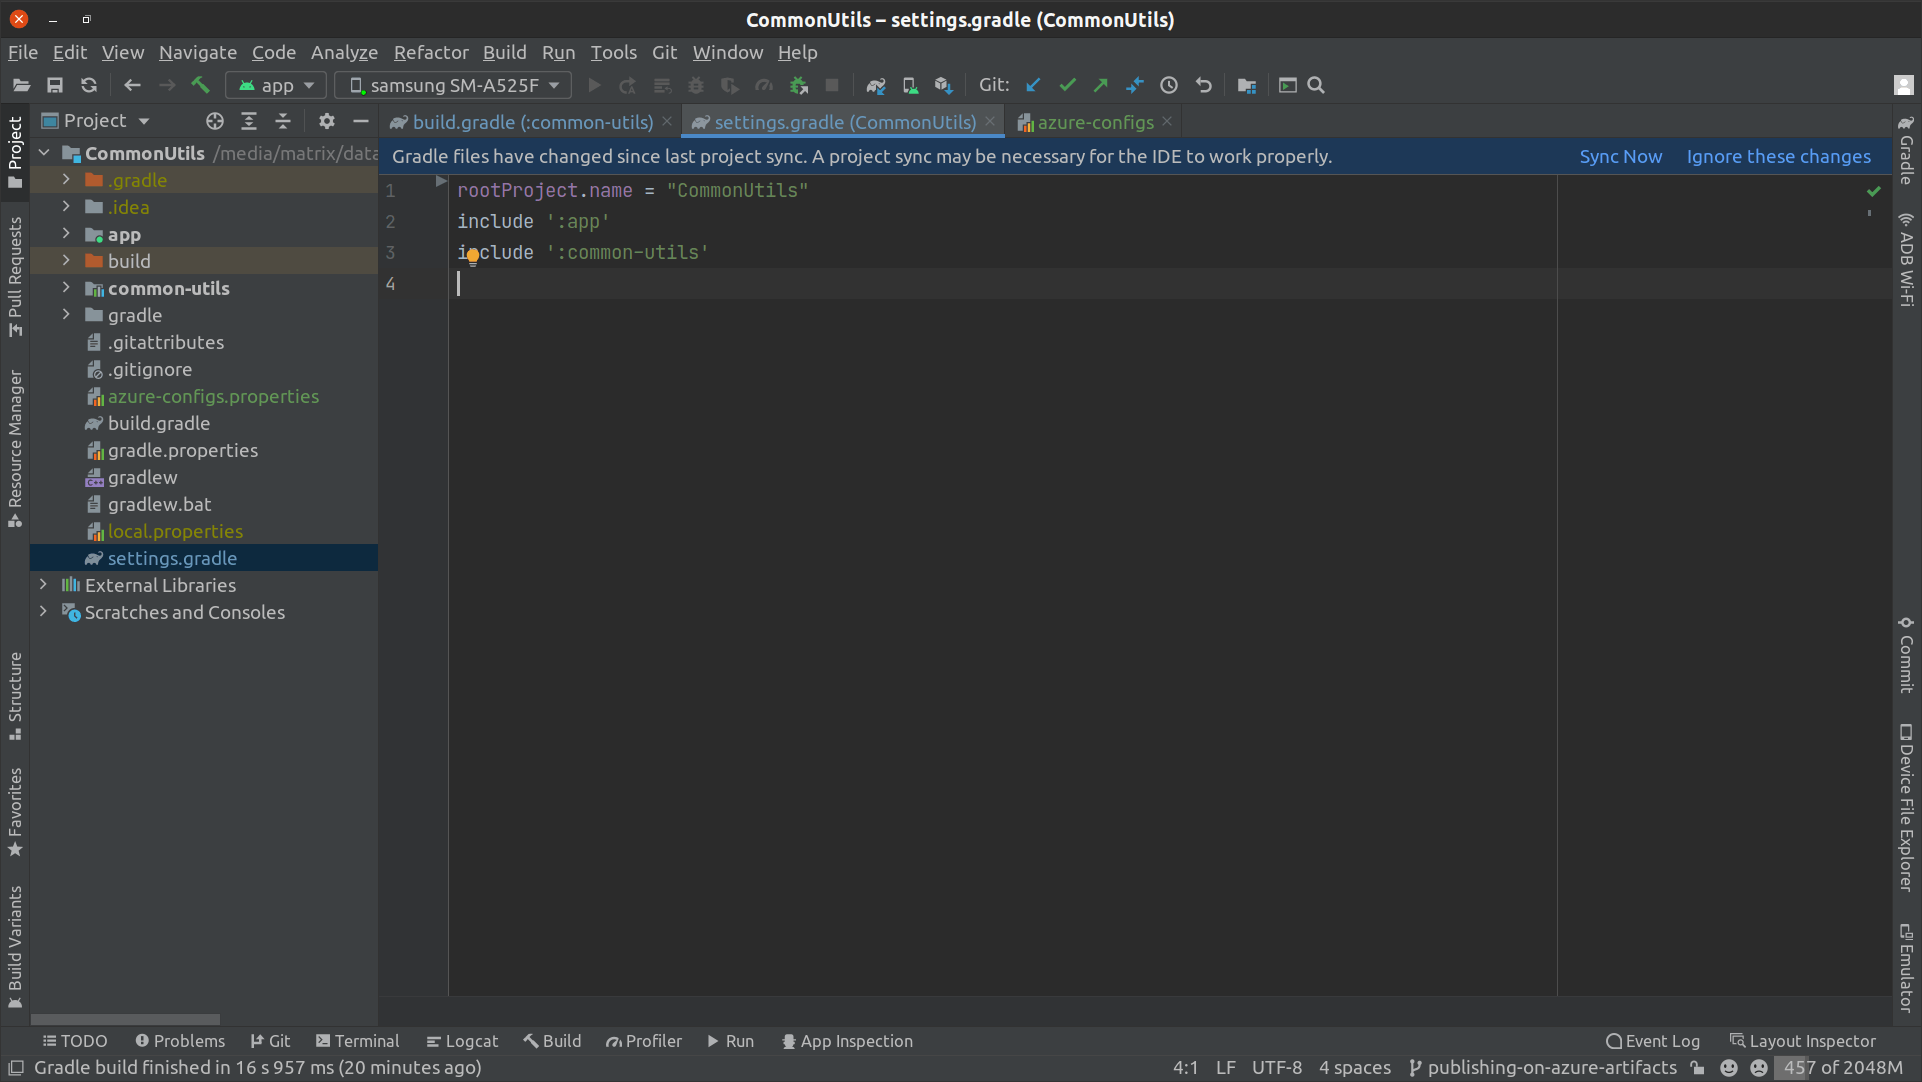
Open the build.gradle file of the 'app' module, after the plugins {} block add following code (which loads the values of the file we created "azure-configs.properties" in order to be able to use them in the gradle script later):
 def keystorePropertiesFile = rootProject.file("azure-configs.properties")
 def keystoreProperties = new Properties()
 keystoreProperties.load(new FileInputStream(keystorePropertiesFile))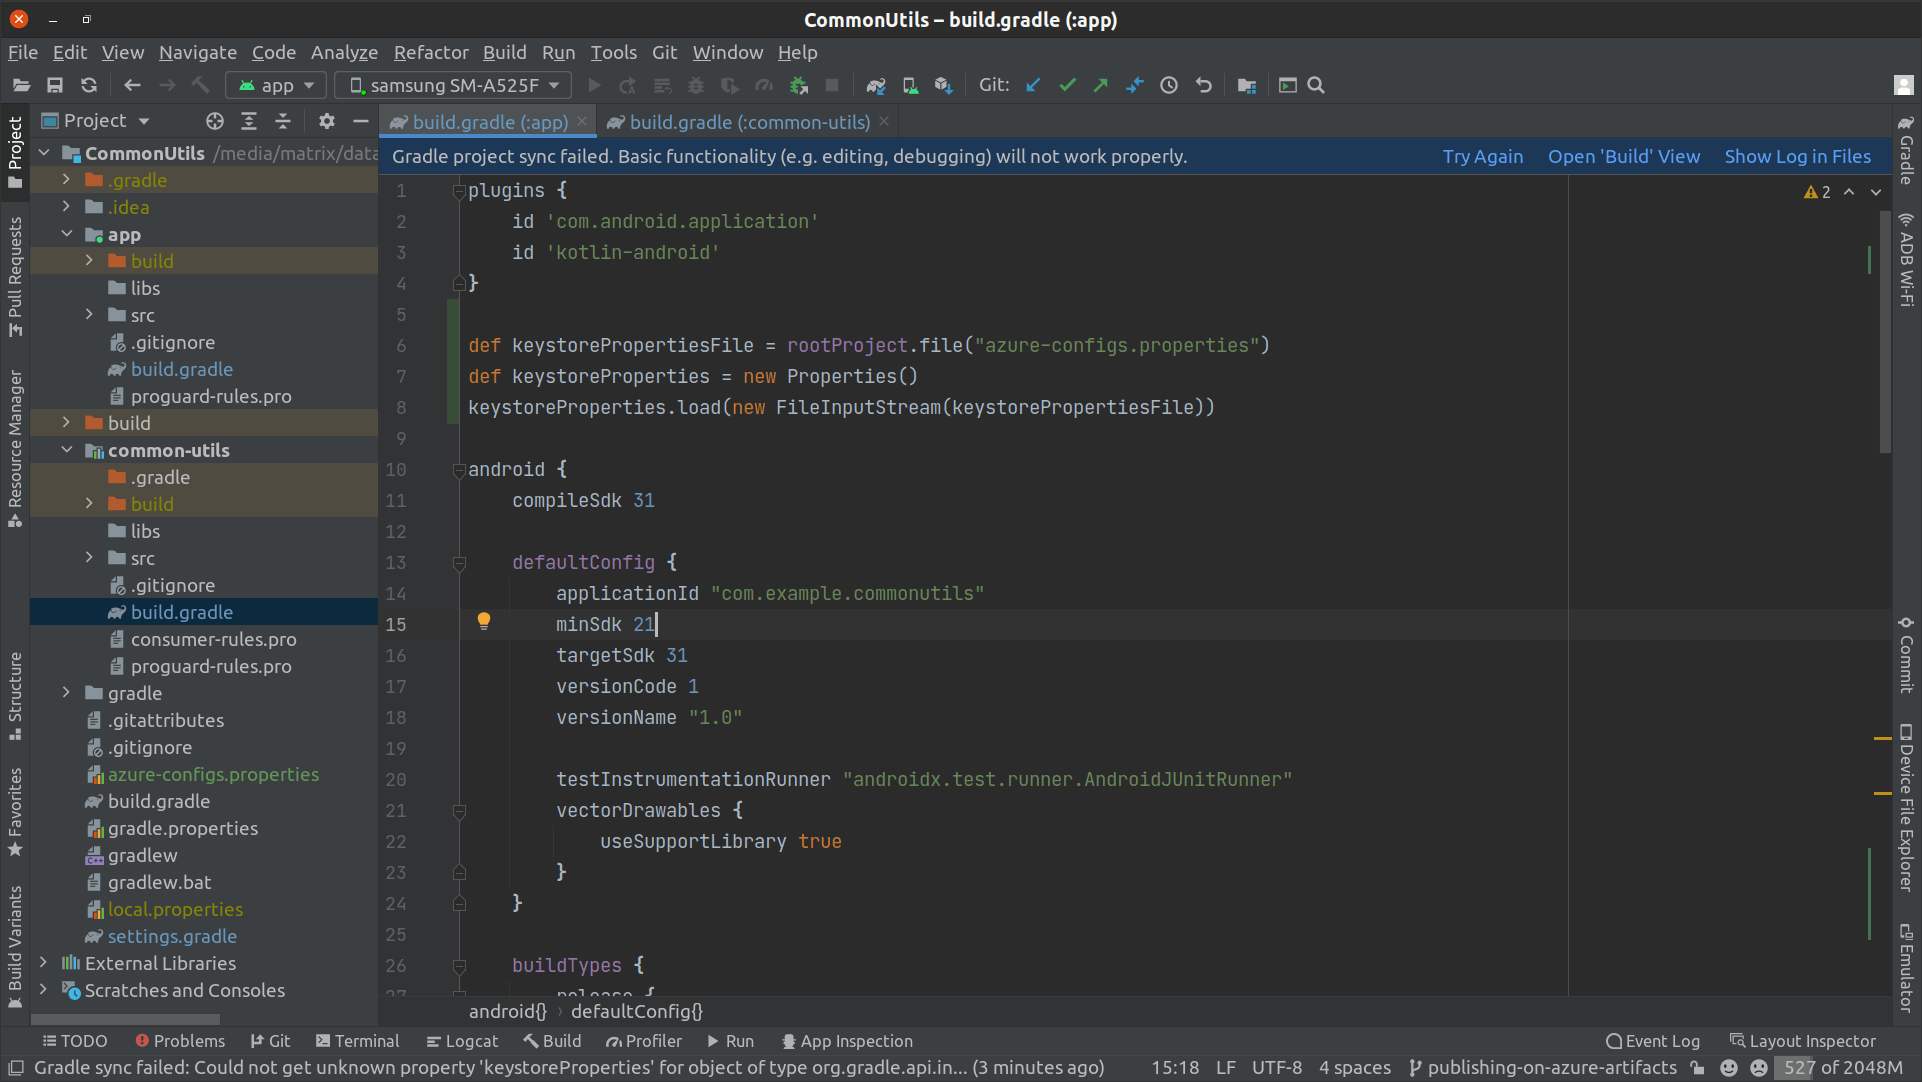
Open the build.gradle file of the 'app' module, in the dependencies{} block change the
implementation project(path: ':common-utils')toimplementation 'com.example:commonutils-release:0.1.0'. After adding this line we changed the dependency of the app module from the local dependency on 'common-utils' library to depend on the remote published library on Azure Artifacts.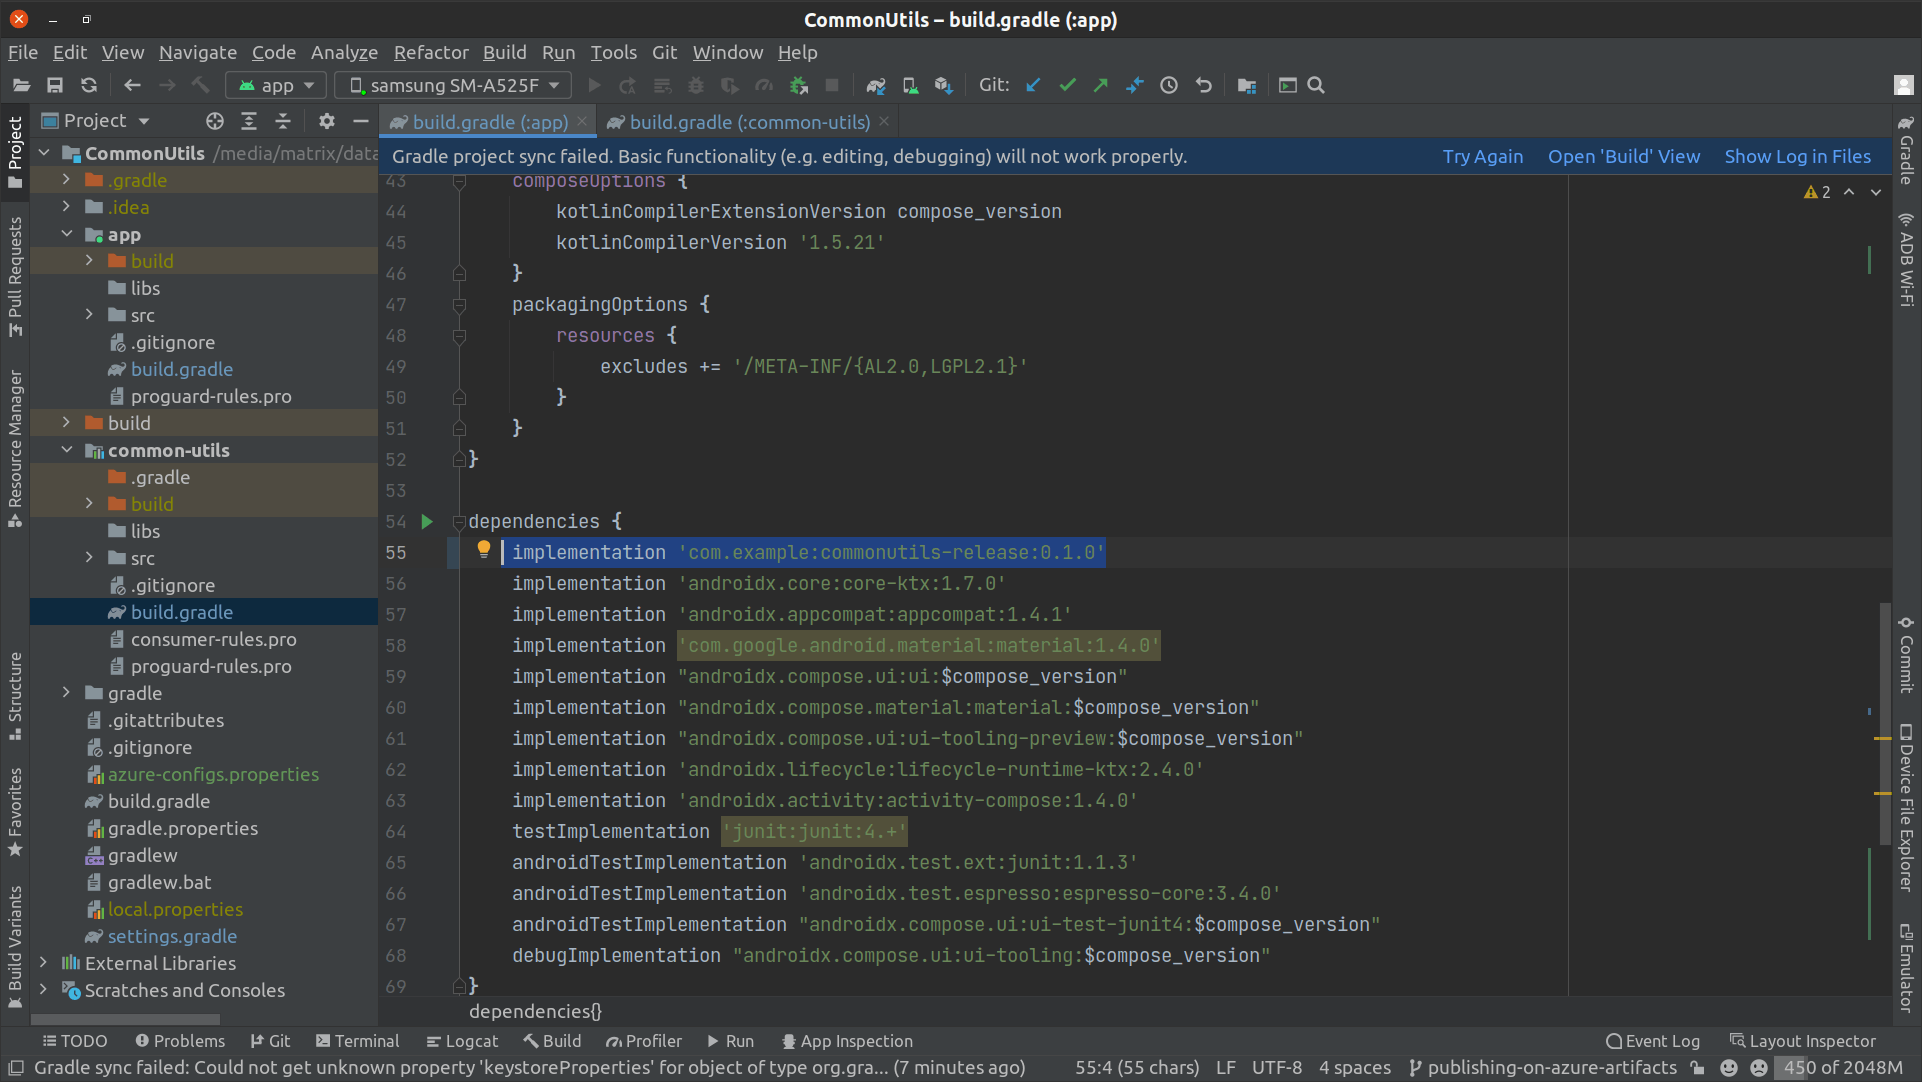
Open the build.gradle file of the 'app' module, after the dependencies{} block add the repository block (which will help gradle locate the published library when it installs all the dependencies of the app module) by adding the following code:
 repositories {
     maven {
         name = 'azure'
         url keystoreProperties['repositoryUrl']
         credentials {
             username keystoreProperties['userName']
             password keystoreProperties['azureMavenAccessToken']
         }
     }
 }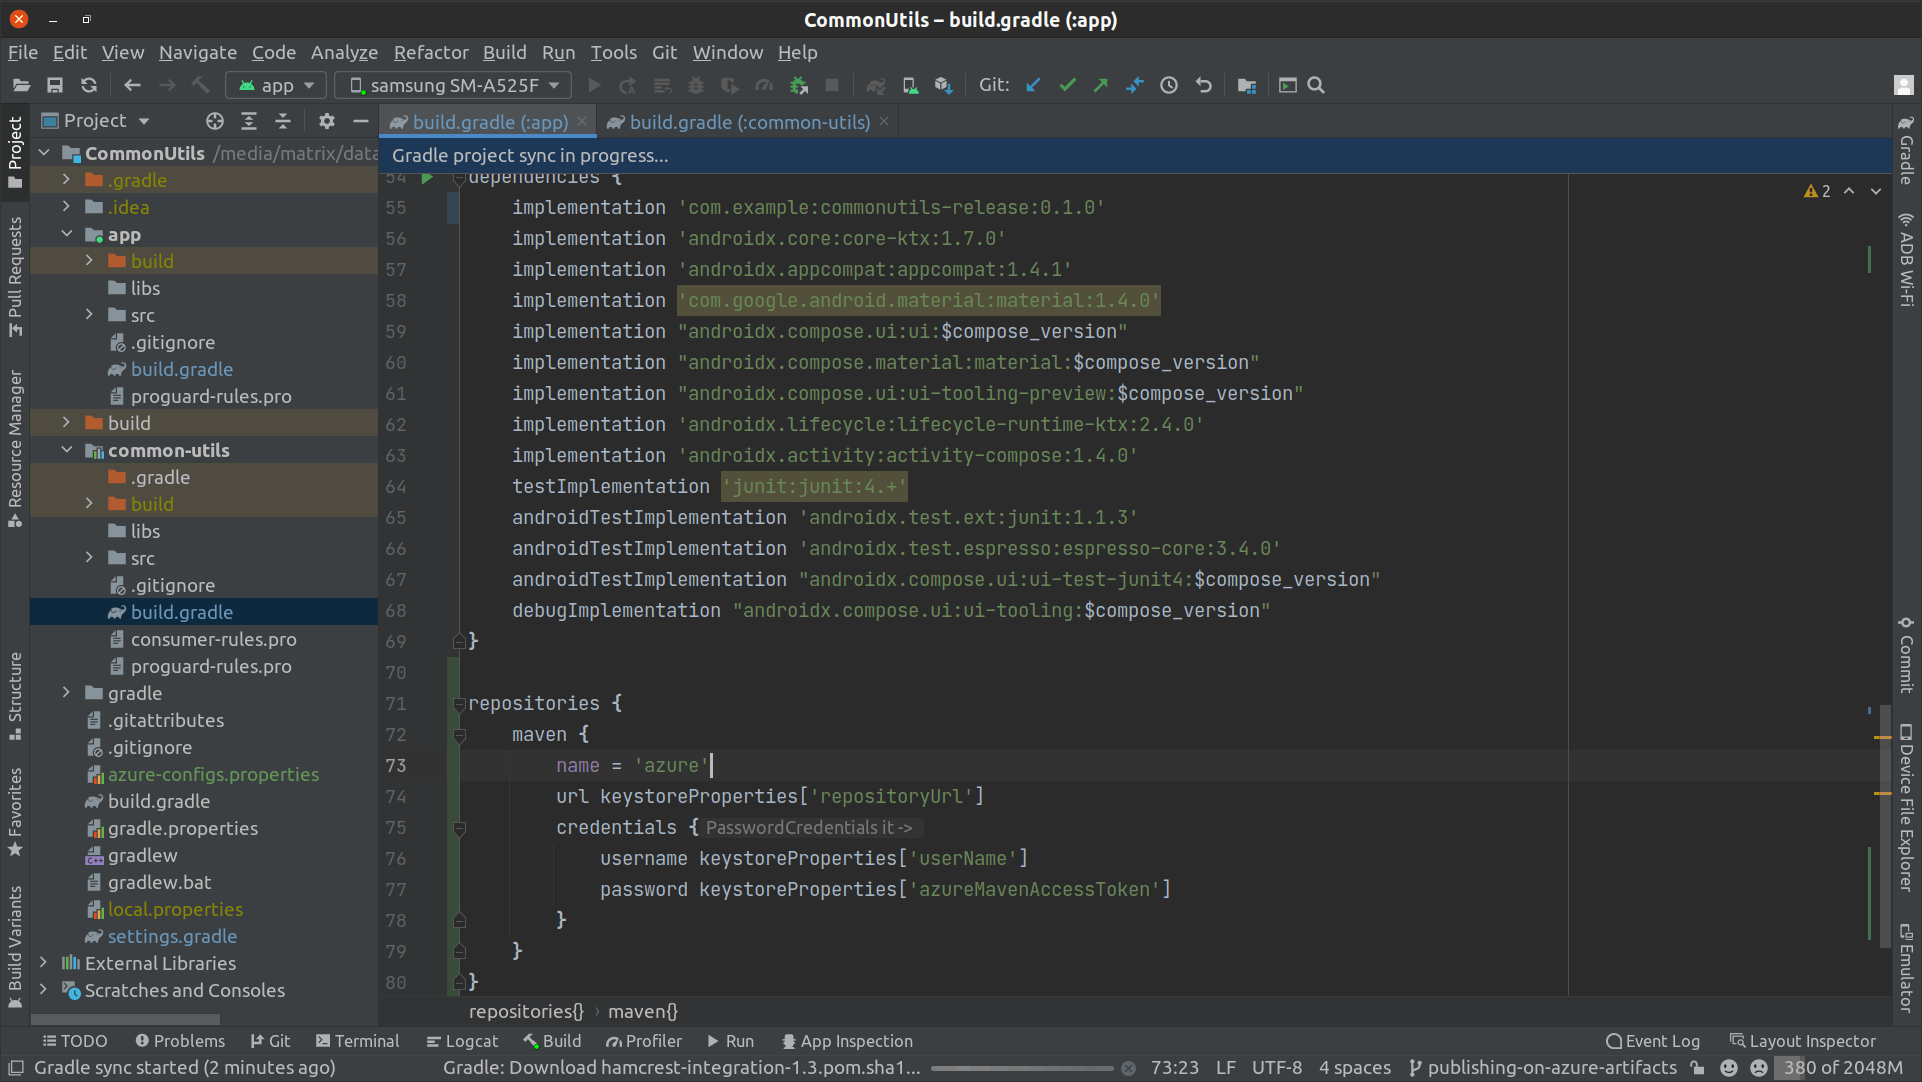
You will be shown an option that the gradle files have changed with a suggestion to sync the gradle files. Click on 'Sync Now' and wait for the gradle sync to finish (while the gradle is syncing, the gradle goes through the dependencies and download them including the published android library).
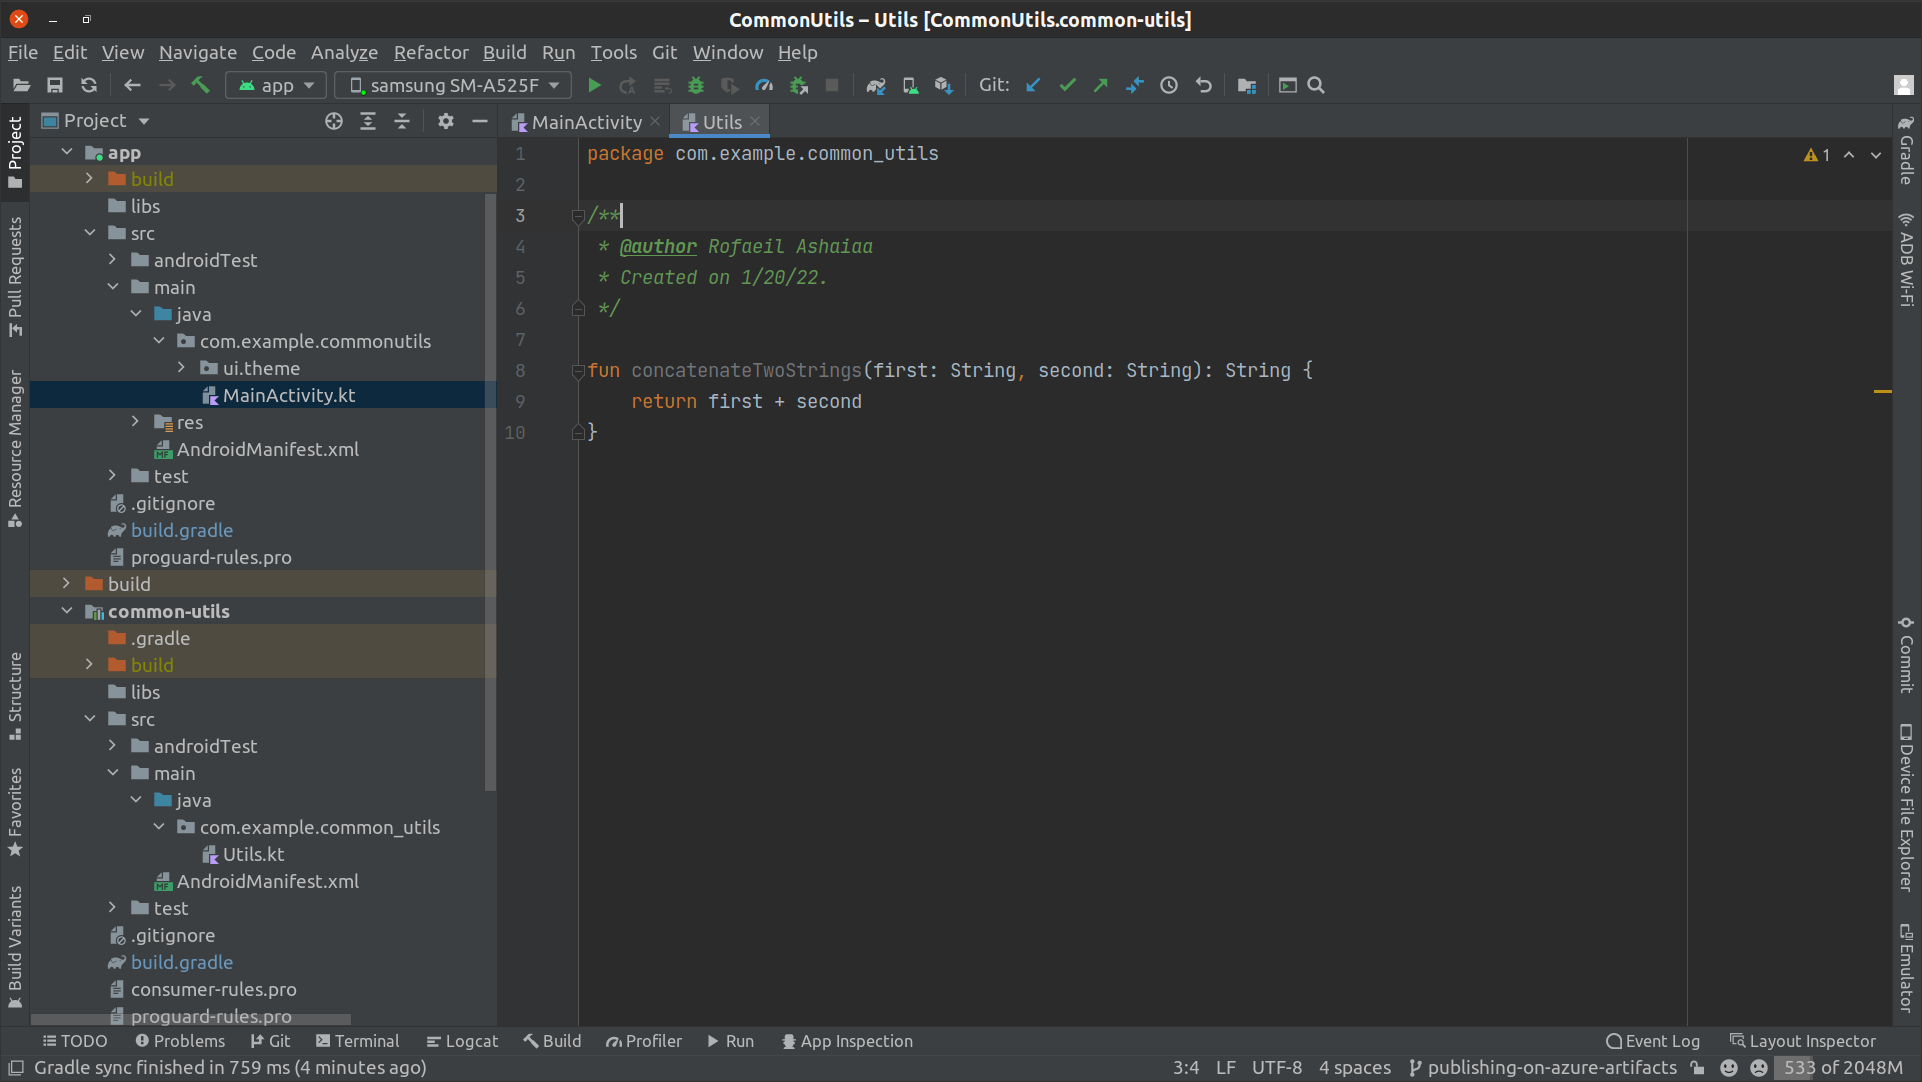
Open the Utils.kt file in the module 'common-utils' (which is the only file in the module), you will only see one function defined called "concatenateTwoStrings()". After that open the MainActivity.kt in the app module (which we created in the previous article of this series) at line 21, you will find that we are using the utility function from the published library with no error (which means you actually added the library from the azure Artifacts repository to your project).

To make sure that everything works fine you can build and run the app and you will get the following:
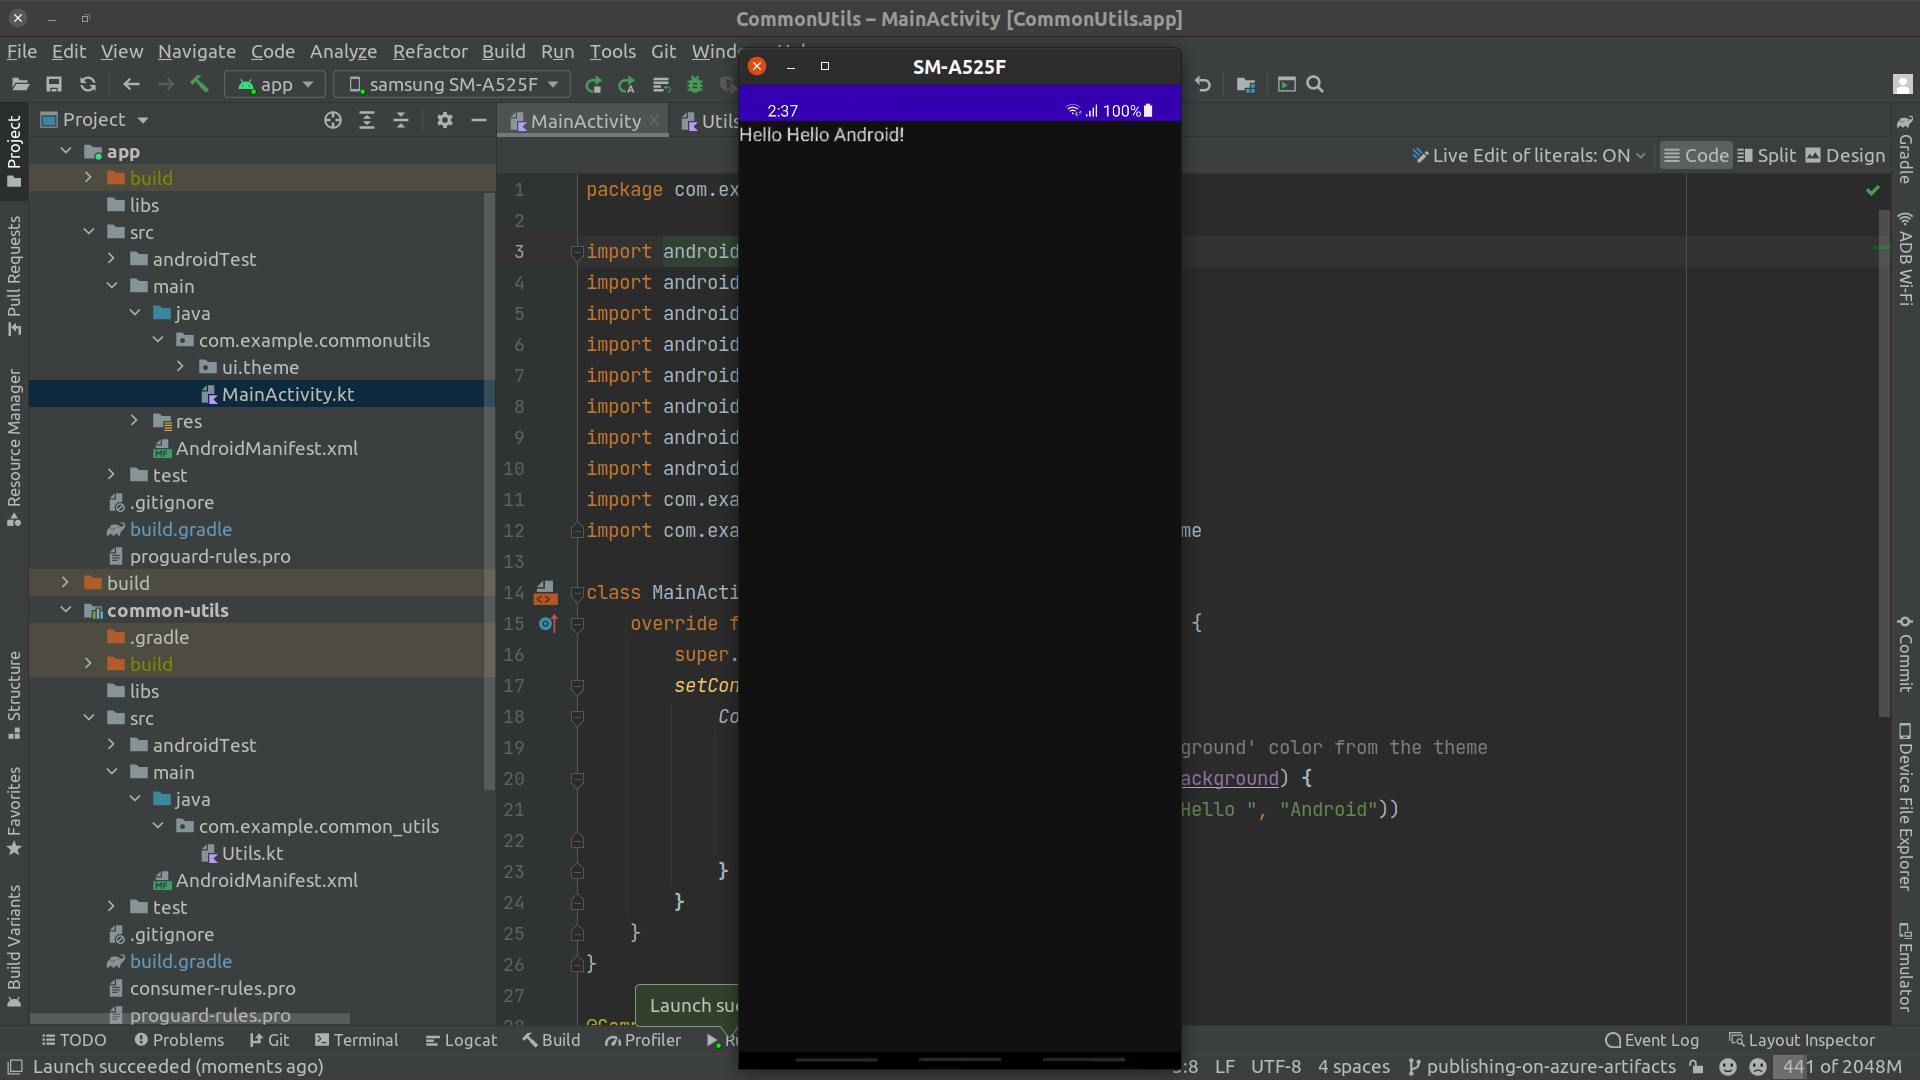
Which means that we added the published utils android library from Azure Artifacts to the app module and used it successfully in another app!
Wrapping it up
In this article we went through how to configure existing an android library to use the Mavin Publish Gradle Plugin to publish the android library to Azure Artifacts and then used the published library in another android app.
You will find the complete sample project for this article on this github repository in a branch called 'publishing-android-library-on-azure-artifacts'
Resources
- Project Repo: https://github.com/RofaeilAshaiaa/CommonUtils/tree/publishing-android-library-on-azure-artifacts
- https://developer.android.com/studio/build/maven-publish-plugin
- https://docs.gradle.org/current/userguide/userguide.html
- https://docs.gradle.org/current/userguide/publishing_setup.html
- https://docs.gradle.org/current/userguide/publishing_maven.html
- https://docs.gradle.org/current/userguide/plugins.html
- https://docs.gradle.org/current/userguide/build_lifecycle.html
- https://docs.microsoft.com/en-us/azure/devops/organizations/projects/create-project
- https://docs.microsoft.com/en-us/azure/devops/artifacts/
- https://docs.microsoft.com/en-us/azure/devops/artifacts/concepts/feeds
- https://docs.microsoft.com/en-us/azure/devops/artifacts/get-started-maven
- https://docs.microsoft.com/en-us/azure/devops/organizations/accounts/use-personal-access-tokens-to-authenticate